Easy Soft Sandwich Bread (VIDEO)
Proceed with caution. You've been warned.
If you’re looking for a fool-proof sandwich bread recipe, this is the one. I know what I’m about to say may be controversial but this easy sandwich bread is (almost) better than my focaccia recipe. And that says ALOT! Made with only 6 simple ingredients, you won’t have any guilt making this bread for your family. Consider this your exclusive, ultimate bread guide.
Why you'll love my recipe.
Quick and easy preparation
Directions are very straightforward and easy to follow. You will be blown away at how amazing it will turn out on your first try!
Extremely soft
I mean, this loaf doubles as a pillow and midnight snack. Need I say more?
Healthier than store bought
Did you know a typical store bought bread has over 10-15 ingredients?! Most of which contain additives, emulsifiers and preservatives. My recipe contains 6 wholesome and fresh ingredients. Never any extra stuff.
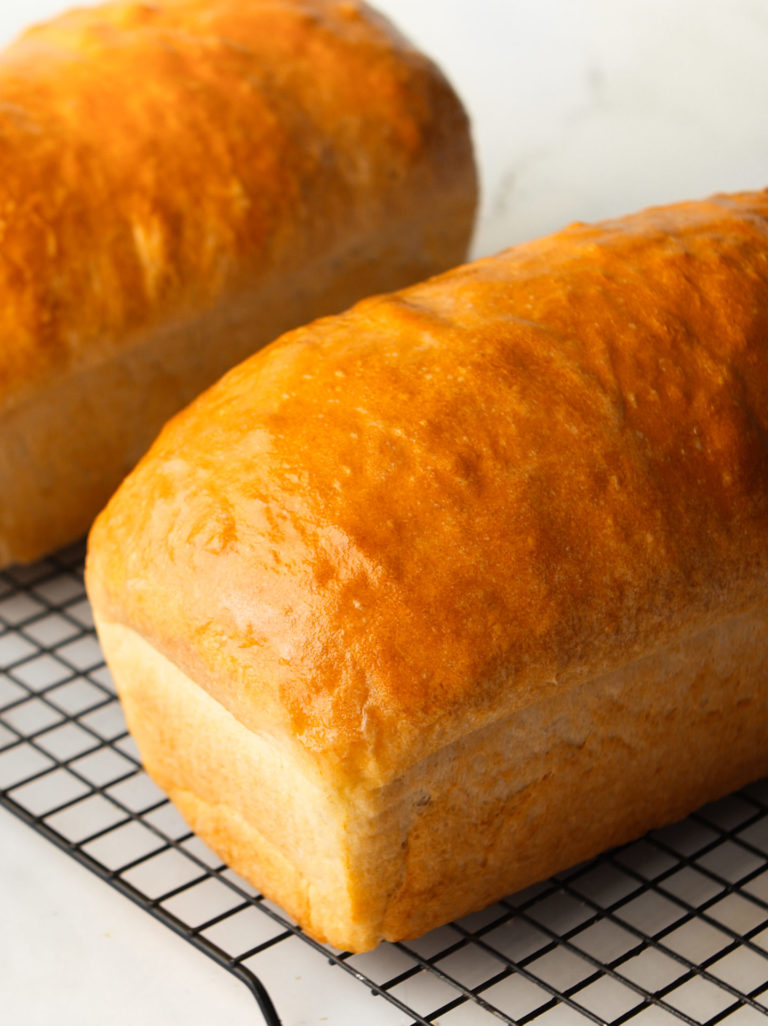
Ingredient notes.
Water
Filtered water is best. This is because tap water may contain impurities like chlorine or minerals that could affect yeast activity and overall quality of the bread. To ensure a clean and consistent environment for the yeast to thrive, use filtered water.
Milk
My original recipe uses 480ml or 2 cups of water. I have recently tested it out with 1 cup of water and 1 cup of whole milk. The bread in general is a bit more dense with milk but still tastes amazing. I personally prefer it with water but either way, you will not be disappointed. Trust me.
Flour
Bread flour is preferred and works best. My brand is imported from Canada and I purchase it from a local wholesale store but Costco has some great options too. Read more about the different types of flour here.
Salt
Adds a little flavor to the bread. I rarely ever use table salt in my recipes. When you see salt, think sea salt. Table salt often contains additives and anti-caking agents, which affects quality of your baked goods. Table salt is also saltier and is not an equal substitute for other salts.
Yeast
This recipe uses instant yeast but you may use active dry yeast instead. See my notes in the recipe for special instructions. Read more about the different types of yeast here.
Butter
Adds moisture and creates a tender crumb.
Honey
Honey has many important jobs in this recipe. It contributes to the golden crust, adds slight flavor and helps naturally slow down mold growth.
What type of yeast should I use?
This recipe uses instant yeast but you may use active dry yeast instead. See my notes in the recipe for special instructions. You can substitute one for the other at a 1:1 ratio but keep in mind, proofing time will differ. If you are a seasoned baker, it will be a little easier to understand the visual cues and know when the dough is ready to use. Both types of yeast act differently and should be treated accordingly. Read more about the different types of yeast here.
How to activate yeast.
If using active dry yeast, first measure 240ml or 1 cup of the warm water from the recipe in a wide mouth cup. Add in a teaspoon of sugar and sprinkle the yeast on top. Whisk together to combine and let it sit for 5-10 minutes until foamy and bubbly on top. Then, add to the dry ingredients, along with the remainder of the water and proceed with baking directions. For extended instructions, see Active Dry Yeast vs. Instant Dry Yeast blog post.
What is hydration rate?
The hydration rate in a given bread dough recipe refers to the amount of water in relation to the amount of flour. The choice between high and low hydration depends on the recipe and preference of the author. High hydration dough has a greater amount of water relative to flour and low hydration dough has less water. This recipe is in between the two.
To calculate the hydration rate of a bread recipe, simply divide the weight of the water by the weight of the flour and multiply by 100. For example, this recipe uses 480ml water and 780g of flour. 480/780 x 100 = 61% hydration.
Sample schedule.
I do not recommend refrigerator rises with this recipe. It’s very easy to over proof the dough in the fridge. When bread “over proofs”, that’s a sign the yeast ran out of food. It will stop working and most likely, the bread will collapse or not rise enough when baked. The room temperature rise is very simple and easy to follow, even for the busiest schedules.
Room temperature first rise, room temperature second rise.
The best method for getting the most fluffy and soft bread is a same day, room temperature rise. Once the dough is mixed, transfer to a large bowl. Lightly coat the bowl and surface of the dough with oil. This prevents the dough from sticking to the sides and allows it to rise without restraint. Cover the bowl with loosely plastic wrap and tea towel and leave it in a warm spot to proof for 2 hours. The second rise in the loaf tins may only take 40 minutes but up to 1 hour, depending on the temperature of the room. The warmer the environment, the quicker the rise but don’t rush it.
Where is the best place to let my dough rise?
The ideal environment for bread to rise is in a warm spot, around 70°F to 80°F / 21°C to 26°C. Most kitchens are drafty and not this warm, which affects the time it takes for your dough to rise.
What if my kitchen is not warm enough?
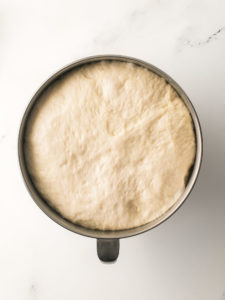
Here’s what I suggest you do: place the bowl (wrapped loosely with plastic wrap and a tea towel on top) inside the oven with the door closed. Of course, the oven needs to be turned off. A microwave works well too. The small enclosed environment is generally warmer and does the trick. Depending on the warmth of the room, it may take more or less time for the dough to rise. Always keep an eye on the overall growth. “Doubled in size” is the best indication for the next steps!
Watch the full recipe tutorial on YouTube.
Expert tips for making sandwich bread.
Allow time to rise
Giving the dough enough time to rise helps with gluten formation. It allows the yeast to ferment, producing carbon dioxide gas which makes the dough expand and create a light and airy texture. Follow the directions and you’ll be good.
Shape the loaf properly
See my step-by-step photos and watch my full video tutorial.
Cool completely before slicing
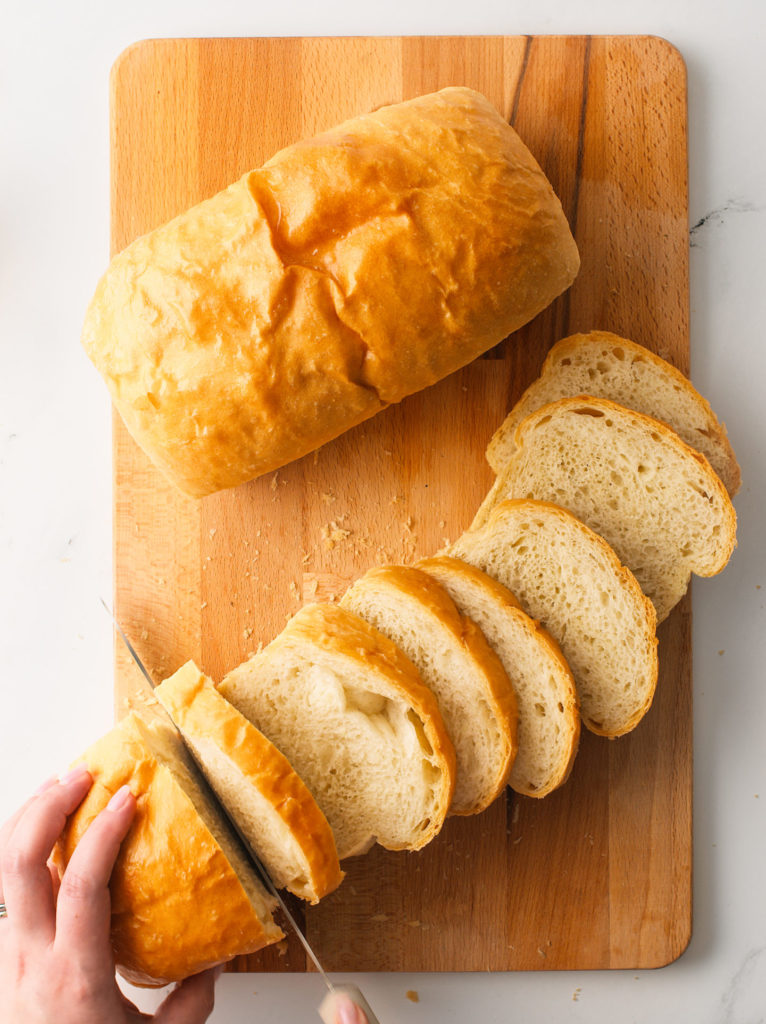
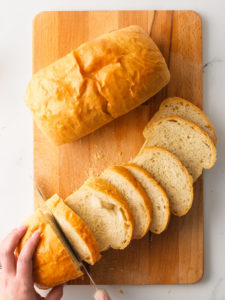
Cutting into hot bread too soon causes the steam to escape, leaving the bread not only dry but gummy and dense. Hot bread is more likely to squish and deform when sliced immediately. Wait for neater and cleaner slices.
What is the best loaf pan to use?
I use 1lb. loaf tins for my sandwich bread. It’s also the same tins I use for my Brown Butter Banana Bread recipe too. (Shop my affiliate link here)
How to shape the dough.
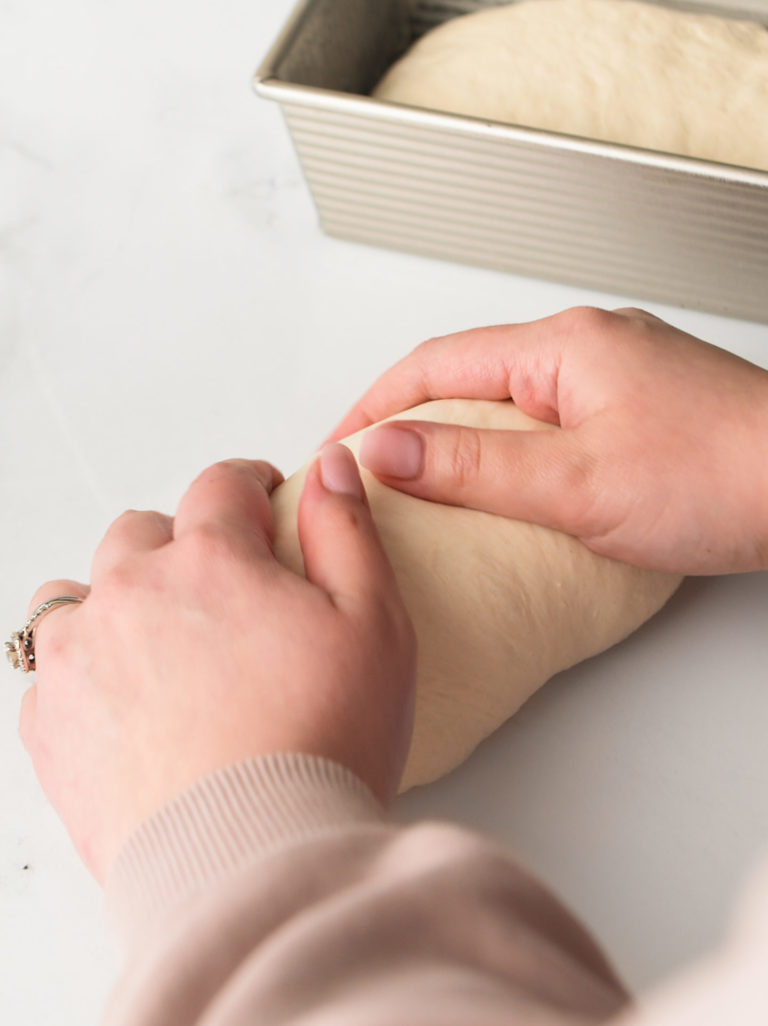
Shaping the dough is very simple and straightforward but before you do that, please equally divide the dough in half. Use a scale for the best accuracy. If one is significantly bigger than the other, you may end up with uneven, uncooked bread and that would be a tragedy!
Step 1
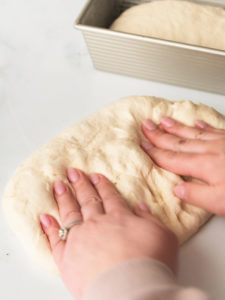
Once you’ve weighed your two dough pieces, about 670g each, flip over so the smoother side is down. Working with one dough piece at a time, use your fingertips to gently flatten the dough into a rectangle, about the same width as the loaf tin.
Step 2
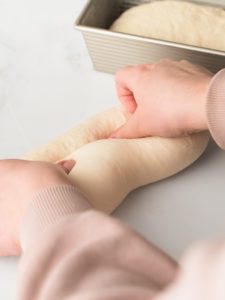
Roll the portion closest to you up and away from you.
Step 3
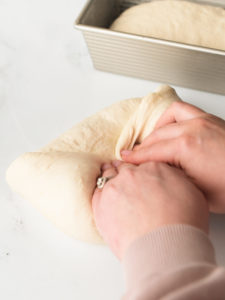
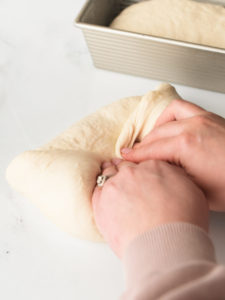
Then, fold the sides towards the center and continue rolling away from you, forming into a small log shape.
Step 4
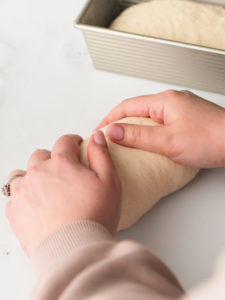
Use the resistance of the surface to pull the dough tightly together. Gently pinch a seal where the edges come together.
How to make sandwich bread.
Make the dough
Using a stand mixer will make the bread making process a lot easier but feel free to knead by hand.
Let it rise
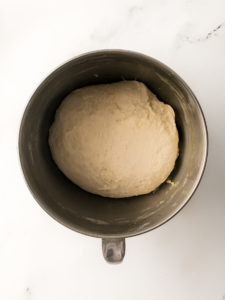
This is the initial, first rise where the yeast does its magic. You’ll know it’s ready when it’s doubled in size.
Shape the dough
Refer back to my step-by-step photos and full video tutorial.
Let it rise
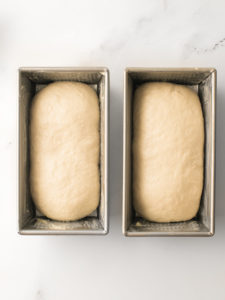
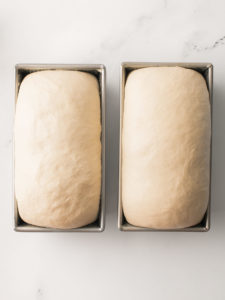
This is the second, final rise where the dough forms its shape in the loaf tin. You’ll know it’s ready when the dough rises above the loaf tin.
Bake
Depending on the strength of your oven, this bread takes about 40-42 minutes to bake.
How to store leftovers.
Store at room temperature
This bread is super soft, even the second day. Generally speaking, homemade bread doesn’t last longer than a few days because it doesn’t contain any preservatives. Store leftovers tightly closed in a brown paper bag or ziploc.
Store in the freezer
Wait until the loaf is completely cooled. Then, simply slice to your desired thickness and place in a freezer safe bag. Store in the freezer for up to one month. I love using frozen leftovers for toast or toasted sandwiches.
Never store in the refrigerator
Do not store bread in the refrigerator. It will cause your bread to become stale and dry faster. It holds well at room temperature with the right precautions.
Your feedback is valuable to us. If you have any questions, please let me know in the comments. If you try my recipes and love them, please take a moment to leave a five star review. Thank you for being part of the Bake Cook Repeat community! Don’t forget to follow us on Facebook, Instagram, Pinterest and Subscribe on YouTube.

Easy Sandwich Bread
Patricia Martinescu from Bake Cook RepeatIngredients
- 6½ cups bread flour
- 2 cups lukewarm water (may substitute with 1 cup of milk and 1 cup of water)
- 4 Tablespoons unsalted butter softened
- 2 Tablespoons honey
- 3 teaspoons instant yeast
- 3 teaspoons sea salt
- 1 Tablespoon unsalted butter for brushing on the bread
- 1 Tablespoon unsalted butter for the loaf tins
Instructions
- Read through the recipe before starting and measure all your ingredients in advance. Go back and watch my full video tutorial, read my expert tips and extended instructions with photos. I highly recommend using metric measurements and weighing the dry and wet ingredients for best accuracy.
- Add the dry ingredients into a stand mixer bowl. Use the dough hook attachment.6½ cups bread flour, 3 teaspoons instant yeast, 3 teaspoons sea salt
- While the mixer is on, slowly add the water, butter and honey. Knead on slow speed for 5-7 minutes until the dry and wet ingredients are fully incorporated, smooth and combined. The dough will start pulling away from the sides of the bowl. The dough will feel tacky but not sticky. Oil your fingers to make handling the dough more manageable.2 cups lukewarm water (may substitute with 1 cup of milk and 1 cup of water), 4 Tablespoons unsalted butter, 2 Tablespoons honey
- Remove the dough from the edges of the mixing bowl, form into a round shape and place back into the bowl. Lightly drizzle the bowl edges and dough with oil. This prevents the dough from getting stuck on the edges when rising. Cover with plastic wrap and place in a warm spot for 2 hours until doubled in size.

- Prepare each 1lb. loaf tin by spreading softened butter on the entire inside surface. Set aside.1 Tablespoon unsalted butter
- Punch the dough down and transfer to a clean, dry work surface. Do not add flour.

- Divide the dough equally in half, about 670g each. Use a scale for best results. Weigh the entire dough ball, then divide that number by half.
- Flip over so the smoother side is down. Working with one dough piece at a time, use your fingertips to gently flatten the dough into a rectangle, about the same width as the loaf tin.

- Roll the portion closest to you up and away from you.

- Then, fold the sides towards the center and continue rolling away from you, forming into a small log shape. Use the resistance of the surface to pull the dough tightly together. Gently pinch a seal where the edges come together.

- Place each dough log into the loaf tin, seam side down. Gently press down the surface of the dough into the loaf tin to release any surface bubbles.

- Loosely cover with plastic wrap and let it rise for at least 40 minutes but up to one hour, depending on the temperature of the room. The dough will rise above the edges of the loaf tin. See step-by-step photos for visual.

- While the dough is rising in the loaf tins, preheat the oven to 350°F / 176°C.
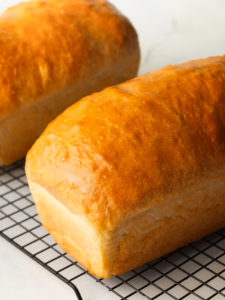
- Remove the plastic wrap and bake for 40-42 minutes until deeply, golden brown. Brush with butter over the tops of the loaves. This helps keep the crust soft and adds a finishing touch. Leave the bread in the tin for at least 10 minutes, then transfer to a rack to cool.1 Tablespoon unsalted butter

- This bread is very soft and fluffy. Slice when completely cool for best results and store leftovers at room temperature for up to 3 days.

Notes
- If using active dry yeast, first measure 240ml or 1 cup of the warm water in a wide mouth cup or bowl. Add in a teaspoon of sugar and sprinkle the yeast on top. Whisk together to combine and let it sit for 5-10 minutes until foamy and bubbly on top. Then, add to the dry ingredients, along with the remainder of the water and proceed with baking directions. For extended instructions, see Active Dry Yeast vs. Instant Dry Yeast blog post.
- I highly recommend to weigh your dry and wet ingredients for best accuracy. If you don't have scale, please measure liquids at eye level and flour with the fluff, spoon and level method. Measuring flour the accurate way is important for baking recipes. See How to Measure Flour blog post.
- Store at room temperature: This bread is super soft, even the second day. Generally speaking, homemade bread doesn't last longer than a few days because it doesn't contain any preservatives. Store leftovers tightly closed in a brown paper bag or Ziploc.
- Store in the freezer: Wait until the loaf is completely cooled. Then, simply slice to your desired thickness and place in a freezer safe bag. Store in the freezer for up to one month. I love using frozen leftovers for toast or toasted sandwiches.
- Never store in the refrigerator: Do not store bread in the refrigerator. It will cause your bread to become stale and dry faster. It holds well at room temperature with the right precautions.
Nutrition
The provided nutritional value above is an estimate per serving. 100% accuracy is not guarenteed. Please see Nutrition Information Disclaimer in our Privacy Policy.
Nutrition Information Disclaimer24 Comments
-
-
 Patricia
Hi Alisha, thank you for such a lovely review! 🙂 We’re happy you enjoyed our sandwich bread so much! I’m working on a sweet version, so stay tuned.
-
-
 Natalia Campos
Hi Patricia!
I try to make this bread, but I couldn’t… the dough was kind of dry, I used the 2 cup of liquid one cup of milk and one cup of water… maybe because I used wheat flour I think is same of All purpose flour??. Where I live is not common the bread flour.-
 Patricia
Hi Natalia, so sorry to hear this! Did you use a scale to measure the flour? We have found that extra flour is usually the culprit when it comes to bread recipes. You should be able to easily use wheat or all-purpose flour with my recipe. We hope you try again!
-
-
 Gabrielle
The BEST bread recipe I have tried so far! I have tried a few bread recipes. Some have come out so so and others have been total fails. This recipe comes out perfect every time! Bread comes out fluffy and delicious.-
 Patricia
Hi Gabrielle! Thanks so much for the lovely review. We’re so happy you found delicious success in our recipe. 🙂
-
-

-
-
 Shirley
Wonderful recipe.. so reliable and yummy! Thank you so much. I love making all your bread! I was wondering if I can make this recipe the same but in a 2lb loaf tin instead of 2 smaller loaves and if you had any hints on any change I might need with proving or baking time or temperature? Thank you so much. Your recipe are a joy!-
 Patricia
Hi Shirley, thank you for the lovely review! 🙂 I would suggest increasing the temperature by 25 degrees. Bake time may be a little shorter but not by much. As long as the tops are deep, golden brown, I would say anywhere between 38-45 minutes, depending on the strength of your oven. I hope this helps!
-
-

-
-

-
-

-
 Patricia
Hi Lily, I have not personally tried to half the recipe but I don’t see why it wouldn’t work. It should be just fine! Please let me know if you do. 🙂
-
-

-
-
 Janice Fletcher
Hi is it possible to reduce the amount of honey, or even leave it out altogether? Thank you
-
 Patricia
Hi Janice! You may decrease to 1 Tablespoon. The honey helps achieve the golden color, gives extra boost of “food” for the yeast and adds an overall pleasant, subtle flavor. I do not suggest leaving it out altogether. I hope this helps. 🙂
-
-
 Holly Pollard
I made this recipe today and I am so happy with how mine turned out!! Wow, so easy to follow and looks as good as yours! -
-

-

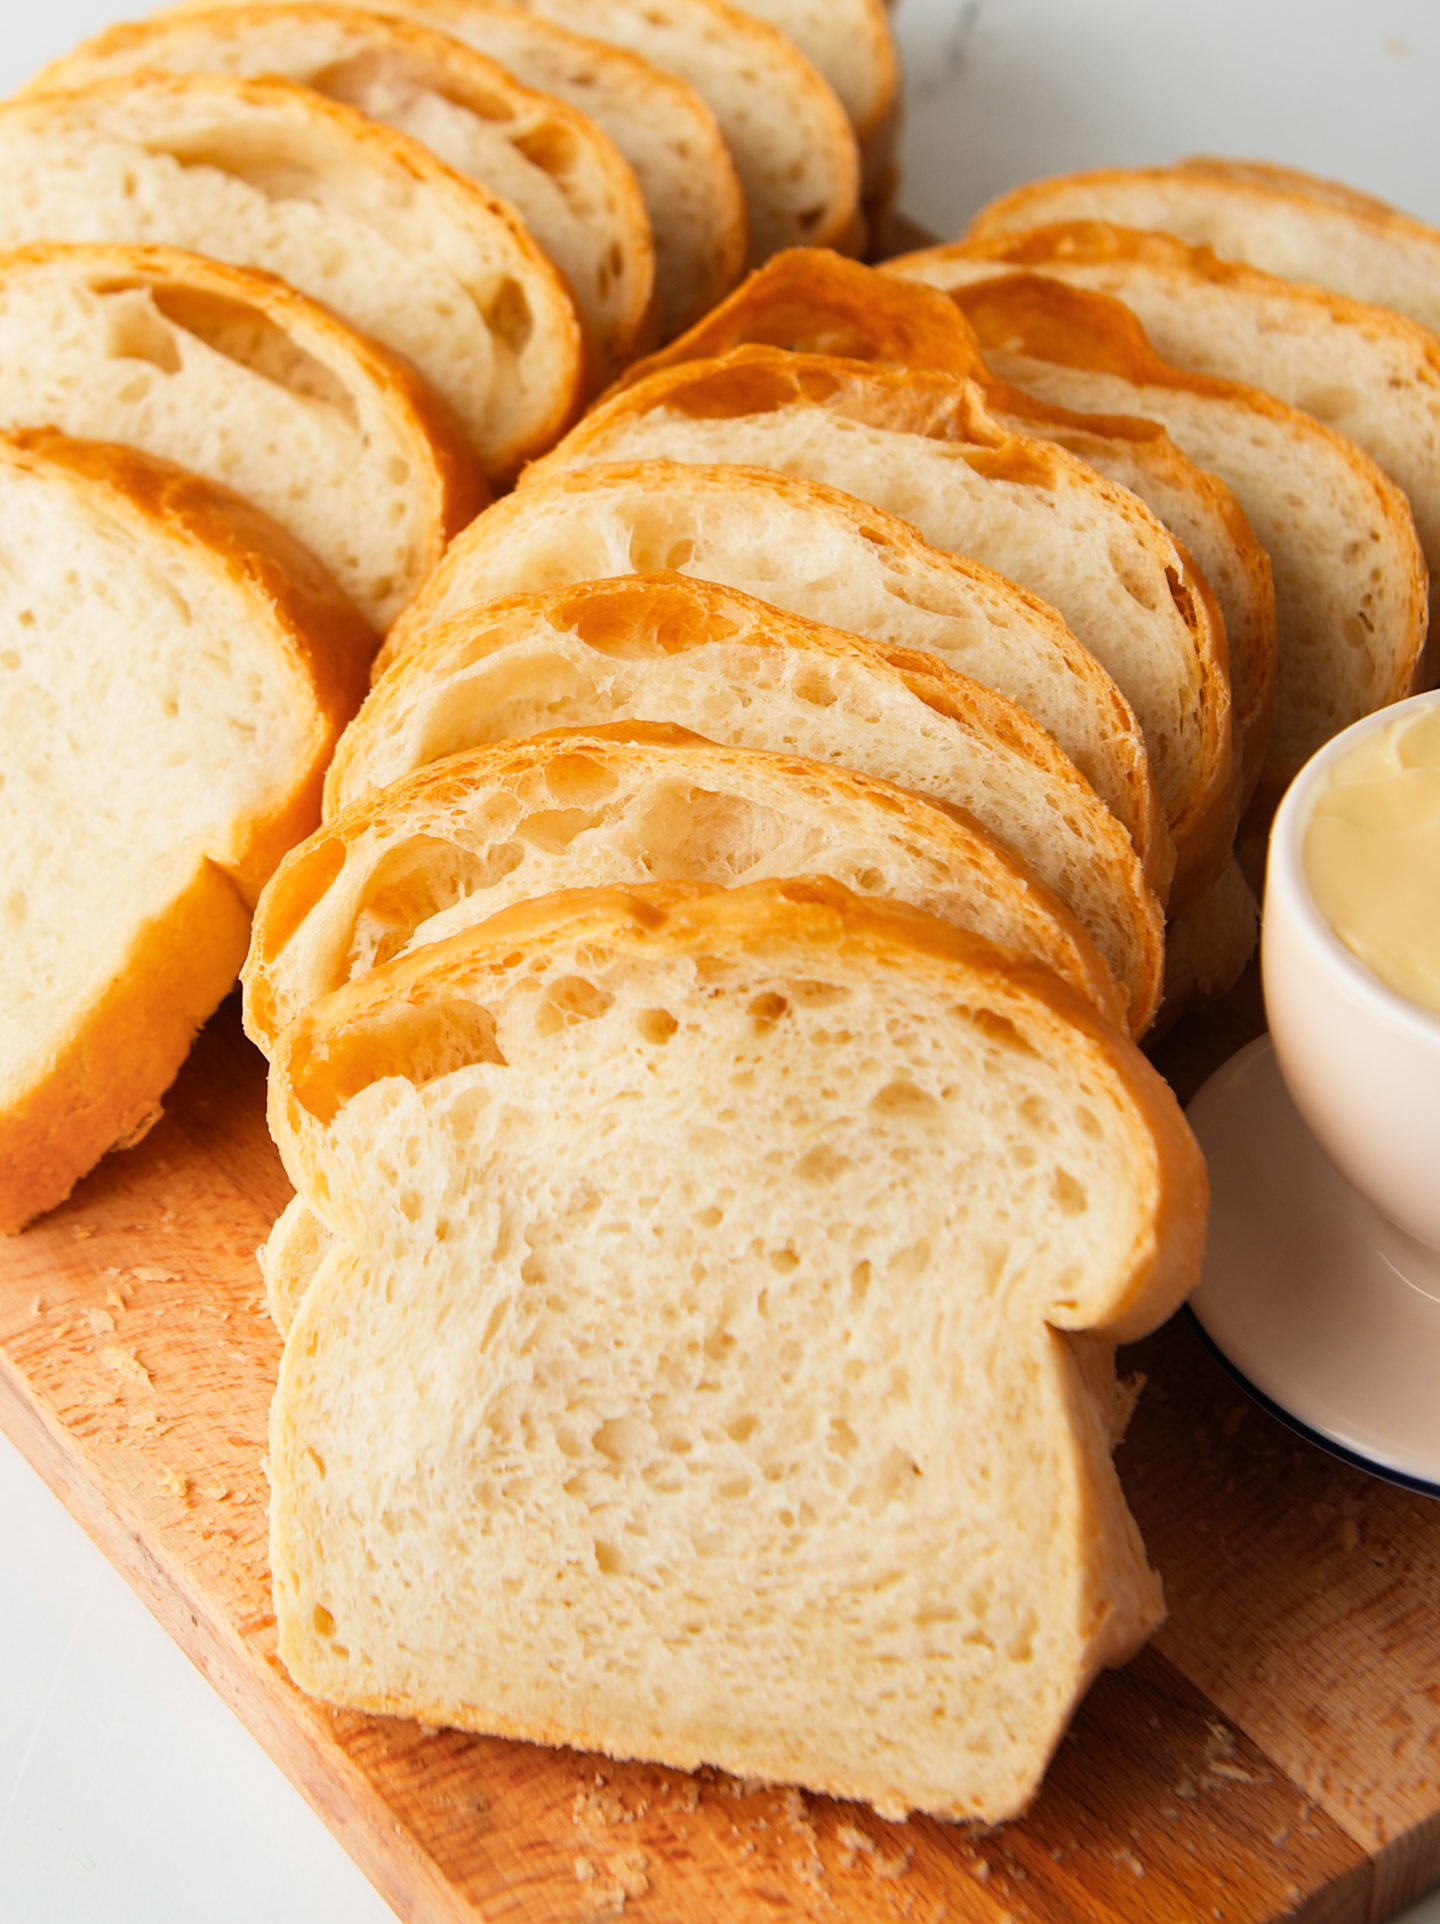
We’ve made this loaf MULTIPLE times and it comes out perfect every time. Its sooooo incredibly soft but also holds its structure for a hefty sandwich! Beginner or novice, you will adore this loaf!!