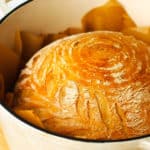
Artisan Bread
Artisan Bread is the perfect recipe for novice bakers who have never made bread before. This bread is delicious for sandwiches, swiping up spreads and dips or our personal favorite, butter and jam. It requires minimal effort on your end. I was once a first time bread maker and trust me when I say, you'll only get better with time.
Ingredients
- 4 cups bread flour, fluffed, spooned and level
- 1 ½ cups lukewarm water
- 2 teaspoons instant yeast see note below if using active dry yeast
- 2 teaspoons sea salt
- 1 teaspoon granulated sugar
- 2 teaspoons corn meal for coating the bottom of the loaf
Instructions
- IMPORTANT READ: Measure flour by weight in grams instead of cups. Please toggle back from US Customary to Metric conversion in my ingredients section above to follow the metric conversion of my dry and wet ingredients. Shop my exact scale here. (affiliate link) If you don't have a scale, fluff the flour with a fork in its container, and then spoon it into the measuring cup before leveling off with a flat edge. Do not scoop directly into the flour bag. This will add way too much flour to the dough, making it dense and dry! Read more about How to Measure Flour with and without a scale.
- In a large mixing bowl, combine flour, yeast, salt and sugar. See note below if using active dry yeast. Add warm water and use a Danish dough whisk or the neck of a wooden spoon to combine. As you mix, the dough will continue to hydrate and become wet and sticky. This may take 1-2 minutes and will be the hardest part of this recipe. Resist the urge to add extra water or flour.1 ½ cups lukewarm water
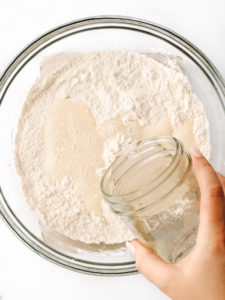
- Once the dough completely sticks to the bottom of the bowl and no flour is visible, use a dough scraper or very wet hands to clean the sides of the bowl and cover with cling wrap and a tea towel. Leave on the counter in a warm spot for 30 minutes.
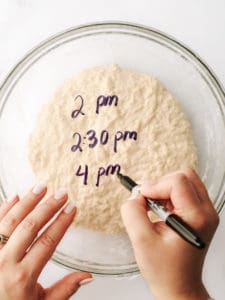
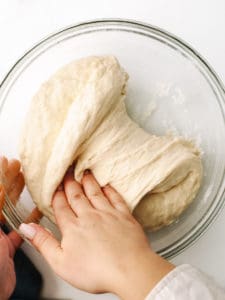
- After 30 minutes, perform a set of stretch and folds. To do this, wet your hands before proceeding as it will make it easier to handle the dough. Pull the dough up and over to the other side of the bowl. Work your way around the dough like you are looking at clock - you want to perform a fold at 12, 3, 6 and 9 o’clock. Form into a round shape. Scrape the sides of the bowl with a wet scraper or your hands.
- Cover again with plastic wrap and tea towel. Let it sit in a warm spot for at least 1½ hours or until doubled in size. If the dough needs more time, let it rise for up to 2 hours, until bubbly and wobbly.
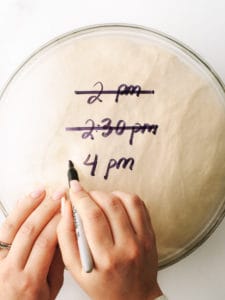
- Once the dough is proofed, place the Dutch oven inside the oven with the lid on. Pre-heat at 450°F for at least 30 minutes prior to baking.
- While the oven is pre-heating, let's form the dough. First, use a dough scraper or very wet hands to release the dough from the sides of the bowl, pulling inwards to form a shaggy, round shape. Similar to the set of folds you did earlier. Wet your hands as needed. Then, dust and rub the entire top surface of the dough with flour. Flip the dough onto the counter, flour side down. This is part intentional. The stickiness of the dough on the inside helps seal the dough shape together when folding. Note: I know the dough is very sticky when shaping and folding. Please use water and flour as needed with your discretion.
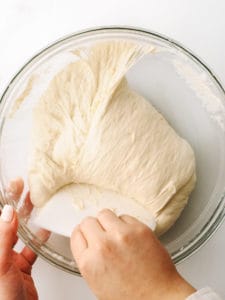
- Gently stretch out the dough to loosen it up. Then, fold into thirds. Do this by first, pulling the top portion of the dough up and towards you. Pull the bottom portion of the dough up and away from you. Turn the dough 180° and then roll the dough away, creating a tight, rough, round shape.
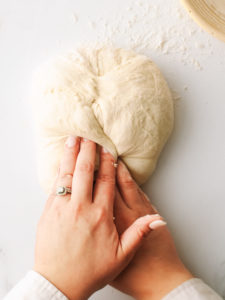
- Use your hands to pull the dough towards you, using resistance from the clean working surface to shape into an even more round shape.2 teaspoons corn meal
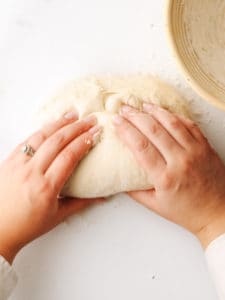
- Place the dough ball into a floured banneton, seam side up. Pinch the seams together and sprinkle corn meal over the top. This is my secret for minimizing burning on the bottom of the loaf. Place in the refrigerator for up to 1½ hours or as little as 30 minutes, while the Dutch oven is pre-heating.
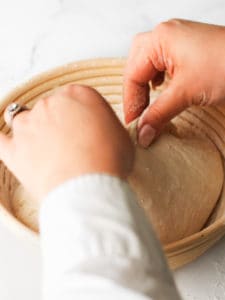
- Flip the dough onto the parchment paper and create an “x” score on top or a pattern of your preference.
- Place the bread with the parchment paper into the pre-heated Dutch oven, pull the paper away from the side and add an ice cub in each corner. Bake for 30 minutes covered with the lid.
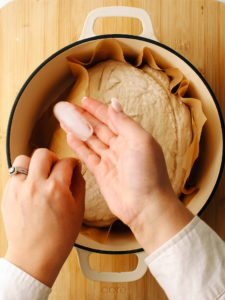
- Remove the lid after 25 minutes.
- Bake for an additional 25-30 minutes or so until desired browning. Depending on the strength of your oven, bake time may vary.
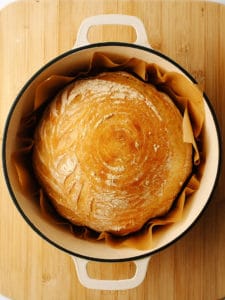
- Remove from the Dutch oven and allow time to cool before slicing.
Video
Notes
- I highly recommend to weigh your dry and wet ingredients for best accuracy. Toggle between the US Customary and Metric tab in the ingredients section above for weight in grams. Shop my exact scale here. (affiliate link) If you don't have a scale, fluff the flour with a fork in its container, and then spoon it into the measuring cup before leveling off with a flat edge. Do not scoop directly into the flour bag. This will add way too much flour to the batter, making it dry!
- If using active dry yeast, first measure 240ml or 1 cup of the warm water in a wide mouth cup or bowl. Add in a teaspoon of sugar and sprinkle the yeast on top. Whisk together to combine and let it sit for 8-10 minutes until foamy and bubbly on top. Then, add to the dry ingredients, along with the remainder of the water and proceed with baking directions. For extended instructions, see Active Dry Yeast vs. Instant Dry Yeast blog post.
Nutrition
Calories: 190kcalCarbohydrates: 38gProtein: 7gFat: 1gSaturated Fat: 0.1gPolyunsaturated Fat: 0.4gMonounsaturated Fat: 0.2gSodium: 467mgPotassium: 74mgFiber: 2gSugar: 0.2gVitamin A: 1IUVitamin C: 0.01mgCalcium: 9mgIron: 1mg
The provided nutritional value above is an estimate per serving. 100% accuracy is not guarenteed. Please see Nutrition Information Disclaimer in our Privacy Policy.
Nutrition Information Disclaimer Have you tried this recipe?Please leave a comment/review below!