Russian Honey Cake Recipe

This post may contain affiliate links. Please see our privacy policy for more details.

Medovik Russian Honey Cake

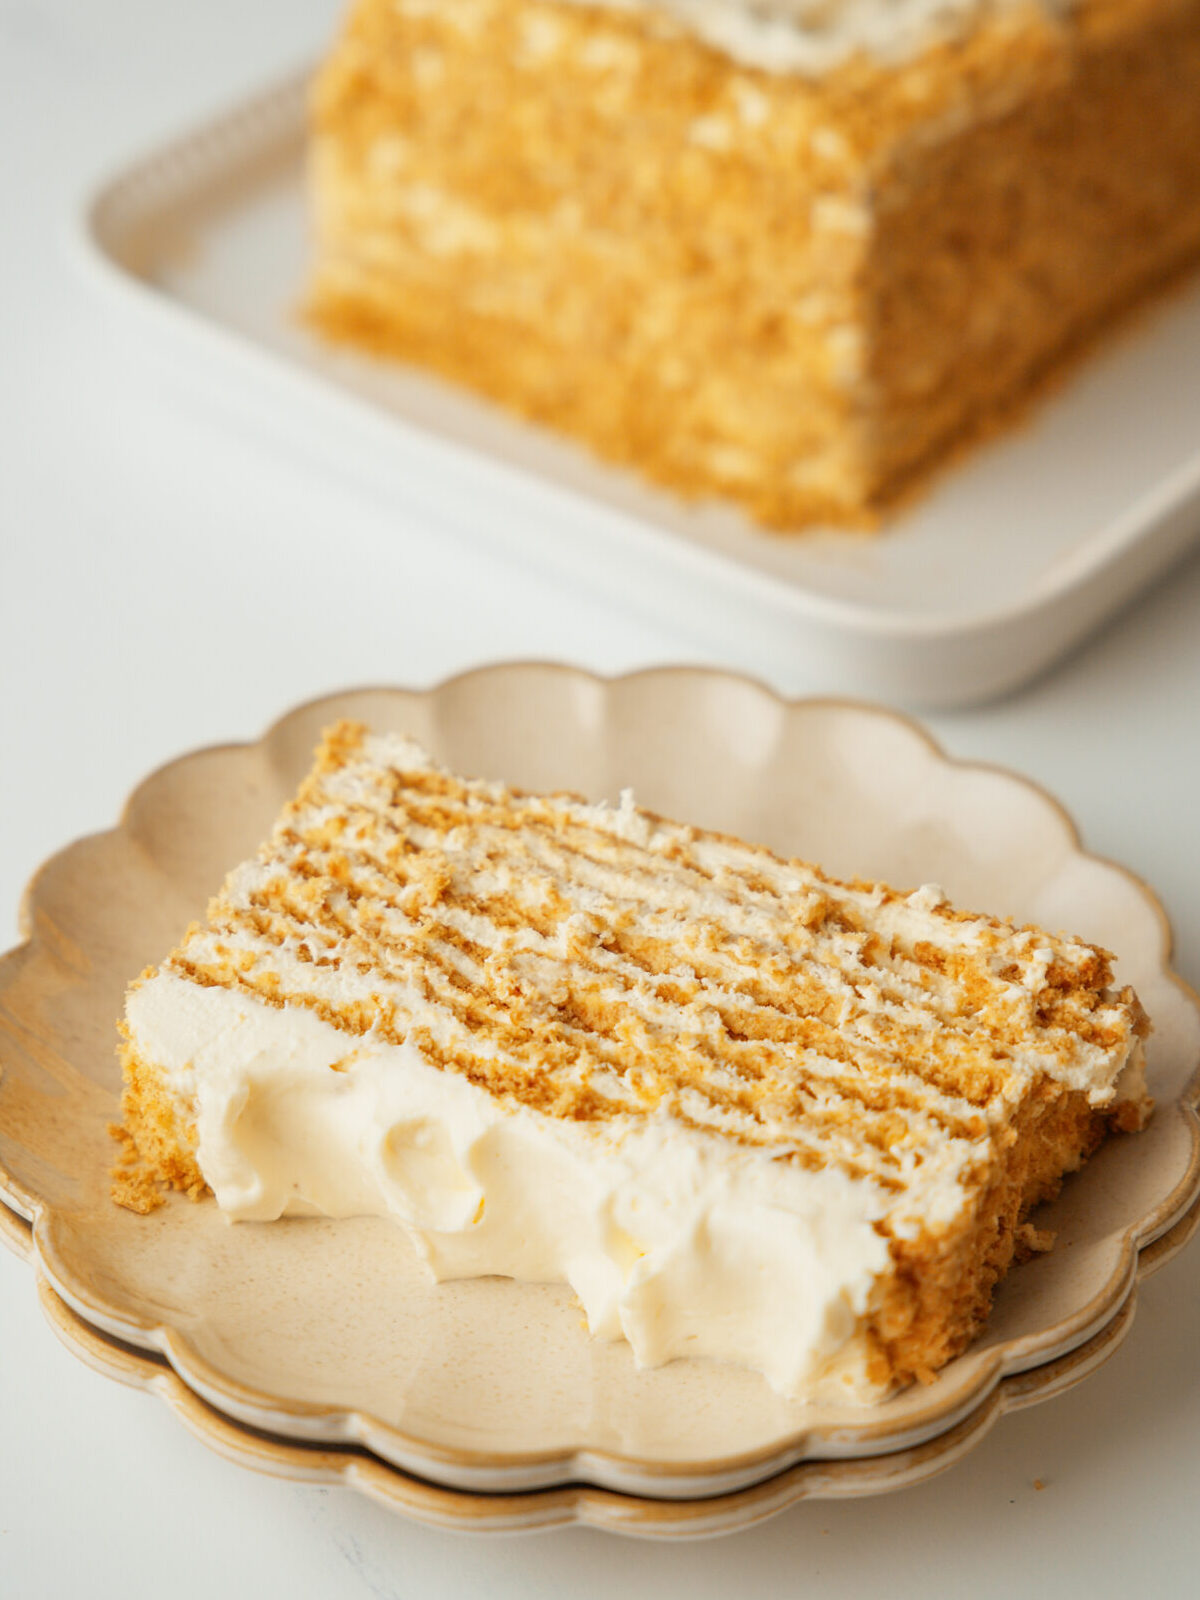
If you’ve never made Russian Honey Cake before, don’t let those beautiful layers intimidate you. This no-bake shortcut version is made with graham crackers! It delivers the classic Medovik flavor with minimum effort and tastes like it took hours to make. 

What is Honey Cake?

Traditional Medovik is a multi-layer honey infused cake with a creamy filling made of sour cream, heavy cream and condensed milk. Instead of making traditional honey cake layers, this shortcut version uses graham crackers to create soft, cake-like layers that form after chilling. Combined with a rich cream filling, this no bake dessert is light, sweet and incredibly satisfying. 

Why you'll love my easy Honey Cake

Easy to make

Easy to prepare in less than 30 minutes. Only needs a few hours in the fridge but you can make it the night before. 

Simple ingredients

Budget friendly with just a few ingredients you probably already have.

No oven required

Easy no bake, make ahead dessert that tastes like you spent all day baking.

Ingredients and substitutions

Graham crackers: Store-bought puff pastry sheets are sold in the refrigerator or freezer section at your local grocery store.

Cream cheese: The base of the creamy filling.

Sour cream: Adds that extra tang to balance the sweetness. A must!

Heavy cream: Use cold heavy whipping cream for best results. 

Vanilla extract: For a little extra flavor.

Powdered sugar: Just enough sugar to satisfy your sweet tooth.

For the rest of the ingredients, please see the recipe card below!

How to toast the graham crackers

The section below is a quick overview of how to make this recipe. For full details, see recipe card below!

Step 1

To a large baking pan, arrange enough graham crackers to cover the bottom of the pan. Lightly brush the top with butter. 
 
Step 2
Bake only the top side at 325°F for 8-10 minutes until golden brown. Set aside to cool completely. Repeat until you have enough graham crackers toasted for 10 layers of 4 graham crackers plus an extra 8 for the outside coating.

How to make the cream filling

The section below is a quick overview of how to make this recipe. For full details, see recipe card below!

Step 1

To a kitchen stand mixer bowl or large mixing bowl, add cream cheese. 
 
Step 2
Beat with the whisk attachment for 2-3 minutes on high speed, scrapping the sides of the bowl. DO NOT SKIP THIS STEP. 
 
Step 3
Once the cream cheese is mixed and soft, add half the heavy cream and sour cream. Beat on high speed for 2-3 minutes until well combined. This is important to avoid clumps.
 
Step 4

Add the rest of the heavy cream with the powdered sugar and vanilla extract. Beat for 1-2 minutes until fluffy and soft peaks form. Do not add too much powdered sugar. The frosting should not be overly sweet since the graham crackers are very sweet! Small clumps may form from the powdered sugar but they should dissolve.

Expert tips from my test kitchen

Generously spread the filling between each layer

The most common mistake is not adding enough filling between graham cracker layers. The crackers absorb the filling so be generous. It should be at least the thickness of the graham crackers,1.5x more!

Refrigerate overnight

For best results, refrigerate at least 4 hours or overnight to the let the layers soften. 

How to assemble the honey cake layers

The section below is a quick overview of how to make this recipe. For full details, see recipe index card below!

Step 1

Pick a serving platter that fits the cake length of 4 graham cracker sheets. Place 4 graham cracker sheets side by side on the serving platter to form the first layer. Put some filling on the bottom to help hold the first layer in place.
 

Step 2

Spread a thick, even layer of the cream filling over the crackers. It should be 1.5x to 2x thickness of the graham crackers. Be generous, graham crackers absorb some of the filling or when you slice, you won’t see any filling.
 

Step 3

Continue layering four graham cracker sheets followed by the cream filling until you have 10 layers of graham crackers. As you build the cake, scrape the edges of the layers if you notice the cream falling on the sides.
 

Step 4

After the last layer, finish with the frosting on top. Cover the tops and sides with the remaining frosting. Gently press handfuls of the crumbs onto the sides. Cover loosely and refrigerate for at least 4 hours or overnight.

Can I make this shortcut Honey Cake in advance?

Yes! The only way for this cake to work is to refrigerate for at least 4 hours or overnight. It actually tastes better the next day as the layers soften, the cream solidifies and making it easier to slice. 

Why does my cake not show the cream layers?

You need to put enough cream between each layer because some of it gets absorbed from the graham crackers. It’s hard to give an exact measurement but the cream layer should be 1.5x to 2x the thickness of the graham cracker.

How long should I refrigerate Honey Cake before serving?

Chill the cake in the fridge at least 4 hours or overnight for best results. This helps the cream set and the layers soften, making it easier to slice.

How to store leftover Honey Cake

Honey Cake is best served cold and a great make ahead recipe. Store leftover assembled cake in an airtight container or wrapped tightly in plastic wrap in the refrigerator for up to 3–4 days to maintain its texture and freshness. 

I hope you love this easy shortcut Honey Cake recipe! Your feedback is valuable to us. If you try my recipes and love them, please take a moment to leave a five star review. Thank you for being part of the Bake Cook Repeat community! Don’t forget to follow us on Facebook, Instagram, Pinterest and Subscribe on YouTube for more easy no bake desserts and baking recipes! 

No Bake Berry Chantilly Flag Cake

This post may contain affiliate links. Please see our privacy policy for more details.

No Bake Berry Chantilly Flag Cake

I give you permission to steal this cake recipe for your Fourth of July dessert. This No Bake Berry Chantilly Flag Cake is light and elegant, layered with fresh berries, fluffy cream and ladyfingers. No oven required. Inspired by the famous cake from Whole Foods.

Why you'll love my Berry Chantilly recipe

Perfect Fourth of July dessert

This patriotic red, white and blue dessert is most popular Fourth of July desserts because it’s refreshing and easy to prepare ahead of time.

No oven required

This no bake cake is perfect for summer days when you don’t want to turn on the oven.

Easy to make

The easiest make ahead cake recipe for spring or summer gatherings. Prep time is under 30 minutes.

Refreshing & light

Serve chilled with lots of fruit.

What is chantilly cream?

Chantilly cream is a lightly sweetened whipped cream with vanilla. Unlike traditional frosting, in this recipe I used cream cheese and heavy whipping cream. This combination creates a stable yet flavorful frosting that pair perfect with the soft ladyfingers and fresh fruit. 

Ingredients and substitutions

Fresh berries: A good variety of blue and red fruit to create the iconic American flag.

Jam: Use high-quality jam. I like blueberry, marionberry or mixed berries. Combined with smashed raspberries for the fruity layer between the cake.

Condensed milk and milk: Both used to soak the ladyfingers.

Ladyfingers: I love using lady fingers because it’s basically dried up cake!

Mascarpone and cream cheese: Stabilizes the chantilly cream and adds more depth in flavor.

Heavy cream: Used for the cream cheese frosting.

Powdered sugar: Ladyfingers are naturally not very sweet. Powdered sugar helps balance the cream and cake layers.

Vanilla extract and almond extract: Adds an extract touch of flavor iconic to chantilly cakes.

For the rest of the ingredients, please see the recipe index card below!

How to make Berry Chantilly Flag Cake

The section below is a quick overview of how to make this recipe. For the full recipe details, see recipe index card below!

Prepare the chantilly cream

In a large mixing bowl, add the softened mascarpone and cream cheese. Beat on high speed for 1-2 minutes until smooth. Beat cold cheeses for 2-3 minutes. This extra step helps prevent clumps.

Add 1/2 of the heavy whipping cream and beat until combined. When adding the last half of the heavy cream, also add the powdered sugar, almond extract and vanilla extract. Whip for 2-3 minutes or until soft peaks form. Do not overmix. Taste and adjust sugar as needed.

Make the jam layer and milk mixture

In a medium bowl, add jam and fresh raspberries. Smash and mix until combined. In a separate bowl, add condensed milk and whole milk. Stir to combine until dissolved. 

Build the first layer

Lightly dip each lady finger in the milk mixture. Arrange in a single layer in a 9″x13″ pan.

Add the cream

Top with 1/3 of the cream of the chantilly cream over the ladyfingers. Use an offset spatula to spread a smooth even layer.

Add the jam

Spread the entire jam over the cream into an even layer.

Repeat the layers

Continue layering the ladyfingers and 1/3 of the chantilly cream. Make sure to reserve enough for the final layer.

How to decorate the flag cake

The section below is a quick overview of how to make this recipe. For the full recipe details, see recipe index card below!

Smooth the top layer

Use an offset spatula to make sure the top layer is smooth.

Create the flag outline

Use the tip of a knife or a toothpick to outline the sections of the flag. Create a rectangle in the upper left corner and 3 horizontal even lines.

Layer the blue section

Layer the blackberries and blueberries in the corner.

Pipe the white stripes

Use a piping bag with a star tip to pipe thick straight lines on the horizontal outlines.

Layer the red fruit

Arrange the strawberries, raspberries and cherries in between the white frosting.

Cover and refrigerate

Cover with plastic wrap and refrigerate overnight for best results. Dust with powdered sugar before serving.

How long do I need to chill Berry Chantilly Cake?

For best results, refrigerate for at least 8 hours or overnight. This gives enough time for the ladyfingers to absorb the surrounding moisture from the cream and jam.

What is the best liquid for dipping ladyfingers?

For the most flavorful results, dip in sweetened condensed milk mixture or a simple syrup. 

How long should I dip the ladyfingers?

Dip each ladyfinger for only 1-2 seconds. They absorb liquid quickly and over-soaking can make the dessert too soft and ruin the layers.

How to store leftover Berry Chantilly Cake

No Bake Berry Chantilly Cake is a delicious make-ahead recipe. Store covered in the refrigerator for up to 3 days. Do not freeze once soaked.

I hope you find this to be the best Tres Leches Cake recipe! Your feedback is valuable to us. If you have any questions, please let me know in the comments. If you try this recipe and love it, please take a moment to leave a five star review. Thank you for being part of the Bake Cook Repeat community! Don’t forget to follow us on Facebook, Instagram, Pinterest and Subscribe on YouTube.

For more cake recipes, be sure to check out my Tres Leches Cake and Strawberry Tiramisu!

Waldorf Salad Recipe

This post may contain affiliate links. Please see our privacy policy for more details.

Waldorf Salad Recipe

This healthy Waldorf Salad is simple, refreshing and ready in minutes. It combines crisp apples, chewy dates, crunchy pecans and celery in a creamy dressing for the perfect balance of sweet and savory flavors. You can serve it for lunch, a holiday gathering or a light dinner side dish.

Why you'll love my easy waldorf salad recipe

Crunchy & Refreshing 

Every bite is a mix of crunch and creaminess. 

Irresistible homemade dressing

The dressing light made with mayo and Greek yogurt. It keeps this salad refreshing without being too heavy.

Easy to prep

There’s no cooking required. It’s simply a matter of washing, chopping and mixing. It can be made ahead of time, making it ideal for meal prep or entertaining.

What is a Waldorf Salad?

Waldorf Salad is a fruit and nut salad. Originally served at the Waldorf Astoria Hotel in New York City in the 1800s, this salad combines apples, celery, dates, arugula, pecans and a creamy dressing for the perfect balance of savory and sweet flavors.

Ingredients and substitutions

Apples: For crunch and sweetness. Compliments all the ingredients well.

Celery: For freshness and crunch. Most of the salad is made up of celery!

Dates: Dates add a caramel-like sweetness and chewy texture that makes this salad so irresistible and rich.

Mayonnaise and Greek yogurt: Greek yogurt adds extra protein and keeps the dressing light.

Parmesan: Adds a nutty, salty flavor and thickens the dressing.

Arugulal (optional): Adds more fullness to the salad but you may skip it completely. 

Lemon juice: Freshy squeezed lemon juice provides acidity, brightness and freshness.

Maple syrup or honey: To balance out the acidity of the lemon and celery.

Olive oil: A good quality olive oil is important as the flavor of the dressing depends on it. 

For the rest of the ingredients, please see the recipe index card below!

How to make the dressing

Step one

In a separate bowl, whisk together mayo, Greek yogurt, garlic, lemon juice, olive oil, salt, pepper, dill and parsley. Whisk until smooth.

Step two

Add parmesan and whisk until thick and combined.

How to make Waldorf Salad

Prepare the ingredients

Wash and chop the apples. Chop the apples and dates into bite sized pieces. Slice the celery and cucumbers into thin round slices. Roughly chop the pecans.

Make the creamy dressing

In a separate bowl, whisk together mayo, Greek yogurt, garlic, lemon juice, olive oil, salt, pepper, dill, parsley and parmesan until smooth.

Combine everything

To a large mixing bowl, add arugula, celery, dates, apples and pecans. Pour the creamy dressing over the top and toss until evenly coated. Best served chilled.  

Tips for the best Waldorf Salad

Chill the ingredients

Place the apples, celery and dates in the fridge before prepping the salad. This salad is best served cold.

Toss apples in lemon juice

Keep the apples fresh by tossing them in water and lemon juice.

Make it a meal

Add grilled or shredded chicken to make it a complete meal.

What are the original ingredients in the Waldorf Salad?

The original salad included apples, celery and mayonnaise. That’s it! I think my version is WAY better!

Can I make this salad ahead of time?

Yes! This salad tastes better chilled in the fridge for a few hours. You can prepare it one day in advance but some of the salad elements may lose their fresh crunch. Make the salad and toss everything together except the pecans and arugula. They will get soggy and loose their crunch.

What are the best apples to use for this salad?

Honeycrisp, Fuji, Gala or Granny smith apples are great choices because they stay crisp. I prefer Gala apples.

What can I serve this salad with?

This healthy Waldorf Salad pairs well at any occasion with any spreads. Serve at holidays, weeknight dinners or special gatherings with a side of grilled chicken or steak and artisan bread.

If you tried this recipe and loved it, please take a moment to leave a five star review. Thank you for being part of the Bake Cook Repeat community! Don’t forget to follow us on Facebook, Instagram, Pinterest and Subscribe on YouTube. 

Russian Honey Cake Recipe

Russian Honey Cake Recipe

If you’ve never made Russian Honey Cake before, don’t et those beautiful layers intimidate you. This no-bake shortcut version is made with graham crackers! It delivers the classic Medovik flavor with minimum effort and tastes like it took hours to make.

No Bake Berry Chantilly Flag Cake

No Bake Berry Chantilly Flag Cake

This No Bake Berry Chantilly Flag Cake is light and elegant, layered with fresh berries, fluffy cream and ladyfingers. No oven required. Inspired by the famous Berry Chantilly Cake from Whole Foods, this version skips the baking and uses ladyfingers instead. 

Waldorf Salad Recipe

Waldorf Salad Recipe

This healthy Waldorf Salad is simple, refreshing and ready in minutes. It combines crisp apples, chewy dates, crunchy pecans and celery in a creamy dressing for the perfect balance of sweet and savory flavors.

One Pan Lemon Chicken and Potatoes

One Pan Lemon Chicken and Potatoes

This recipe is proof that chicken and potatoes don’t have to be boring. One-pan Lemon Chicken and Potatoes only require less than 10 minutes of prep time for a flavor that tastes like you’ve been in the kitchen all day.

Stuffed Shells Recipe

Stuffed Shells Recipe

Stuffed Shells. Easy, cheesy and perfect every time. Jumbo pasta shells filled with a creamy ricotta and spinach filling, baked in a rich marinara sauce. This Classic Italian American dish checks every box for a delicious dinner!

One Pan Dumpling Bake

One Pan Dumpling Bake

This One Pan Dumpling Bake recipe is worth the hype! It tastes like something you would order from Din Tai Fung. What makes this recipe great for quick weeknight dinners is the easy steps and simple ingredients. 

Skillet Jalapeno Popper Chicken Recipe

Skillet Jalapeno Popper Chicken Recipe

If you love the bold, creamy and spicy flavors of jalapeno poppers, then this one-pot Jalapeno Popper Chicken recipe is about to become a weeknight favorite. Creamy sauce nestled between tender chicken and spicy jalapenos. 

Banana Chocolate Chip Muffins

Banana Chocolate Chip Muffins

Looking for the best Banana Chocolate Chip Muffins that are moist, fluffy and loaded with gooey chocolate chips? This easy homemade muffin recipe is make with ripe bananas, simple ingredients and comes together in one bowl. Perfect for Breakfast, snacks or dessert!

This post may contain affiliate links. Please see our privacy policy for more details.

Napoleon Cake

Learn how to make the best Napoleon cake with this easy, bakery-style recipe. Napoleon Cake is a beloved classic dessert known for its thin and flaky puff pastry layers and smooth, luscious pastry cream filling in between. This Napoleon recipe is rich in flavor, light in texture, and perfect for any occasion. I don’t claim to be a professional cake maker but if I can do this, so can you!

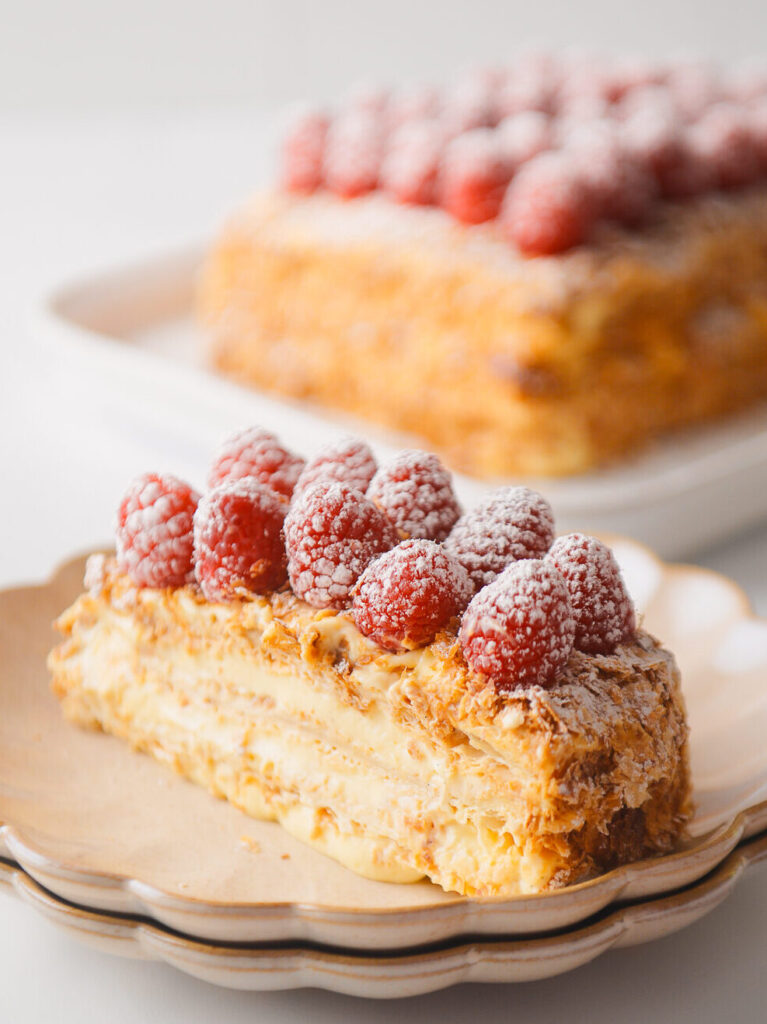
Napoleon Cake slice on scalloped plate.

What is Napoleon Cake?

Napoleon Cake is a popular Eastern European dessert, often considered a variation of Mille-Feuille in France or Cremeschnitte in Romania. Also known as Russian Napoleon Cake and French Napoleon Cake, this Napoleon dessert features multiple thin layers of crisp, buttery layers of puff pastry dough filled with rich, homemade diplomat cream. This cake is traditionally left to rest overnight, allowing the cream to soften the pastry for a tender, melt-in-your-mouth texture.

Why you'll love my easy Napoleon cake recipe

Bakery style cake

The best thing about this easy Napoleon cake is that it tastes (and looks) like you bought it from your local European bakery – with flaky cake layers and a rich pastry cream recipe that rivals anything store-bought.

Simple ingredients

This easy Napoleon pastry recipe skips the homemade puff pastry dough without sacrificing flavor or texture. You’ll still get those signature flaky cake layers and rich layers of pastry cream using just a few simple steps.

Simple equipment

A stand mixer and food processor aren’t needed for this recipe. The main things you’ll need are a whisk, a mesh sieve, a saucepan, a rolling pin, a hand mixer, and an offset spatula.


Ingredients and substitutions

Puff pastry: In the words of the lovely Ina Garten, “Store-bought puff pastry is fine!” I typically make this recipe with store-bought puff pastry. Store-bought puff pastry sheets are sold in the refrigerator or freezer section at your local grocery store.

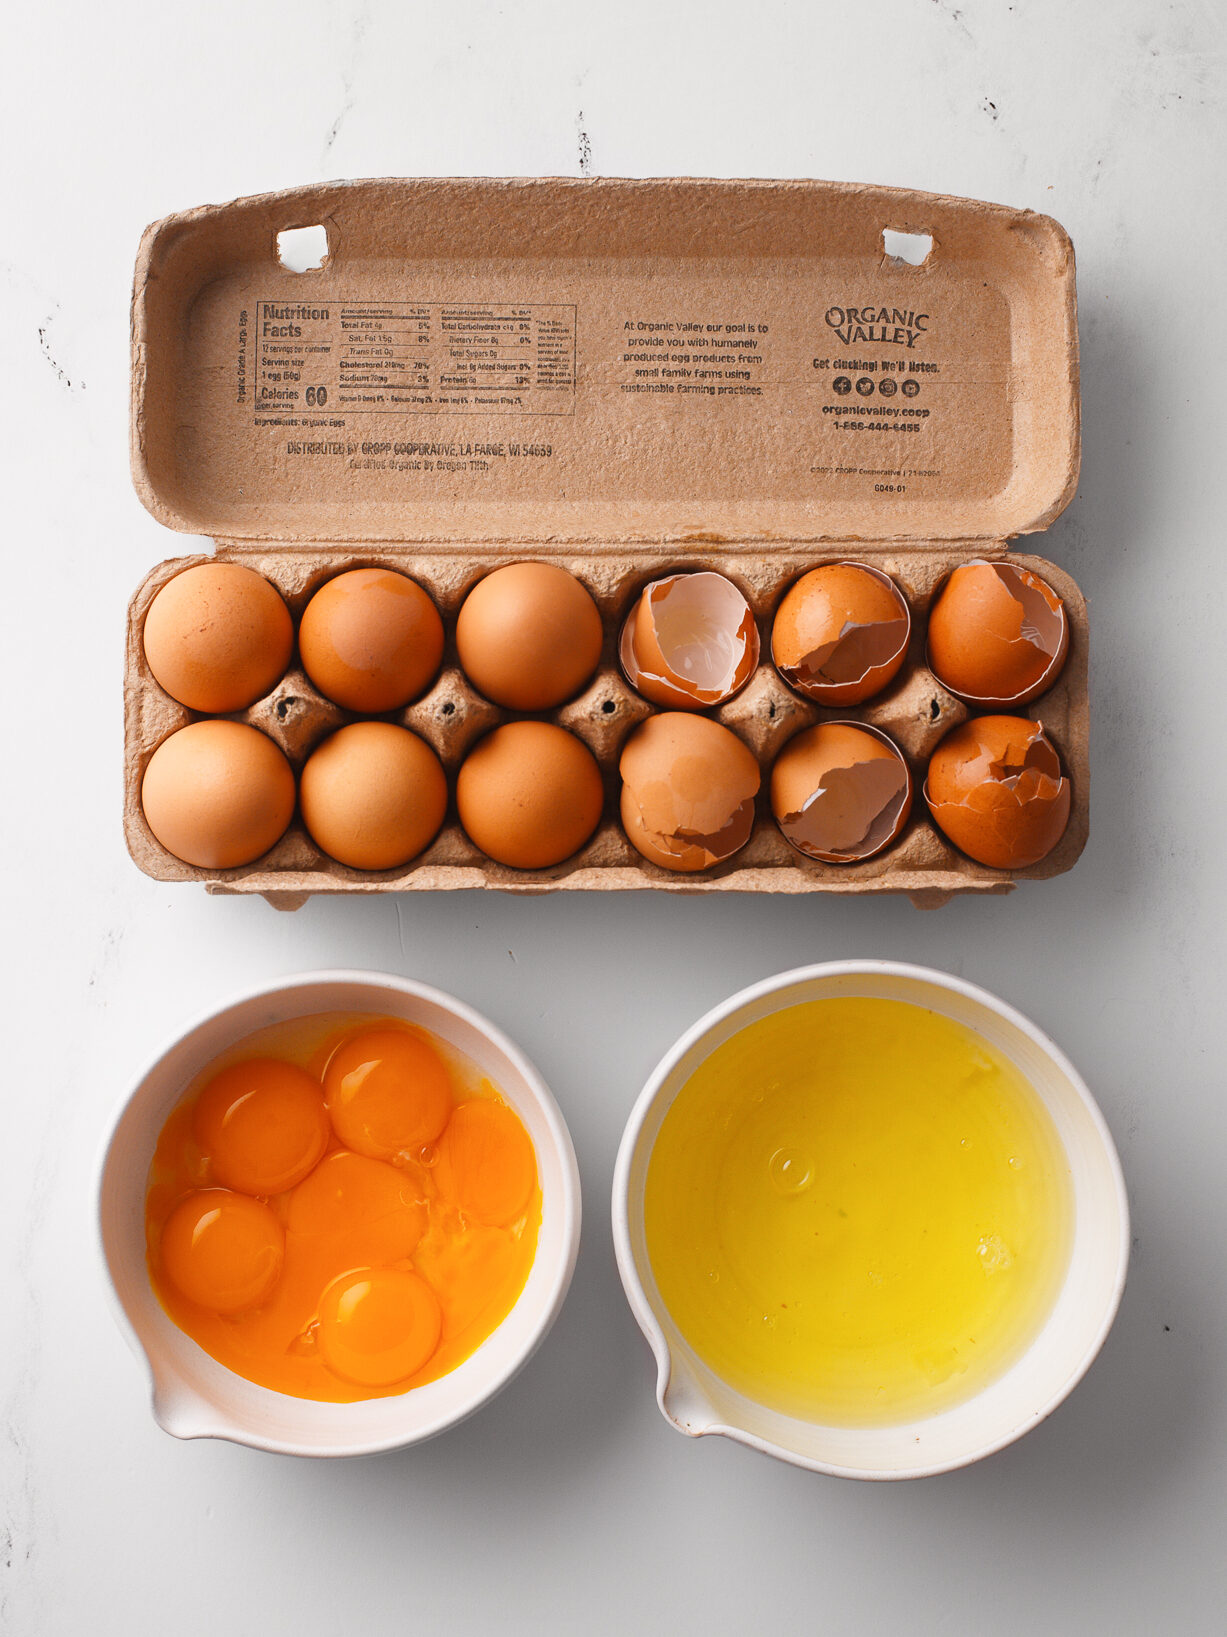
Egg yolks : You’ll need whole eggs, but we’ll be separating the yolks and whites for different parts of the recipe. The egg yolks add richness to the diplomat cream, while the whipped egg whites are folded in for lightness and structure. Be sure to use large eggs.

Sugar: Just enough sugar to satisfy your sweet tooth.

Corn starch: Corn starch helps thicken the pastry cream. 

Vanilla bean pods: While vanilla pods are the classic, preferred choice for this dessert, you can substitute it for two teaspoons of high-quality, pure vanilla extract or 1 Tablespoon of vanilla bean paste.

Powdered sugar: For dusting and decoration.

Heavy cream: Use cold heavy whipping cream for best results. This helps the custard cream hold its structure and creates a fluffy, stable texture. Avoid using light cream, condensed milk, Cool Whip, sour cream, cream cheese, or half-and-half, which won’t whip properly.

For the rest of the ingredients, please see the recipe card below!

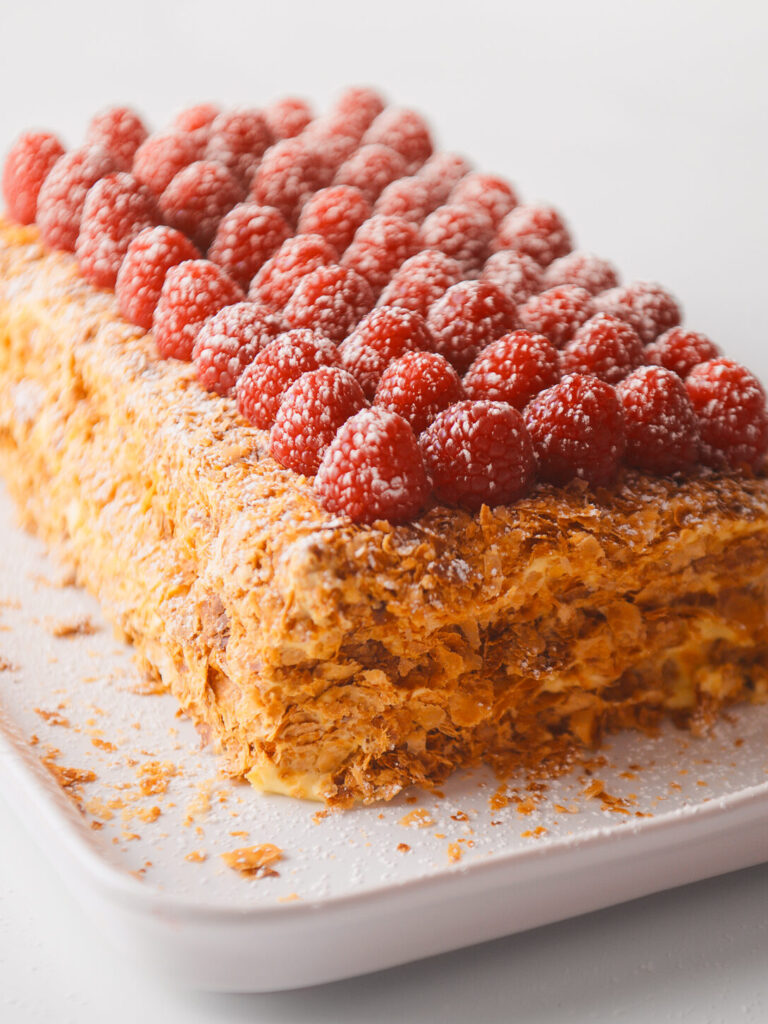
Napoleon Cake topped with a layer of fresh raspberries.

What is diplomat cream?

Diplomat cream, also known as crème diplomate or diplomat custard, is a light, creamy filling used in pastries and desserts like eclairs, cream puffs, and fruit tarts. It is made by combining pastry cream (which is a thick custard made from milk, eggs, sugar, corn starch) and heavy whipping cream.  Unlike mousseline cream, which is made by combining pastry cream with softened butter (avoid cold butter in this case), diplomat cream is lightened with heavy whipped cream for a softer, more delicate finish.

How to make diplomat cream

The section below is a quick overview of how to make this recipe. For full details, see recipe card below!

Cream the eggs

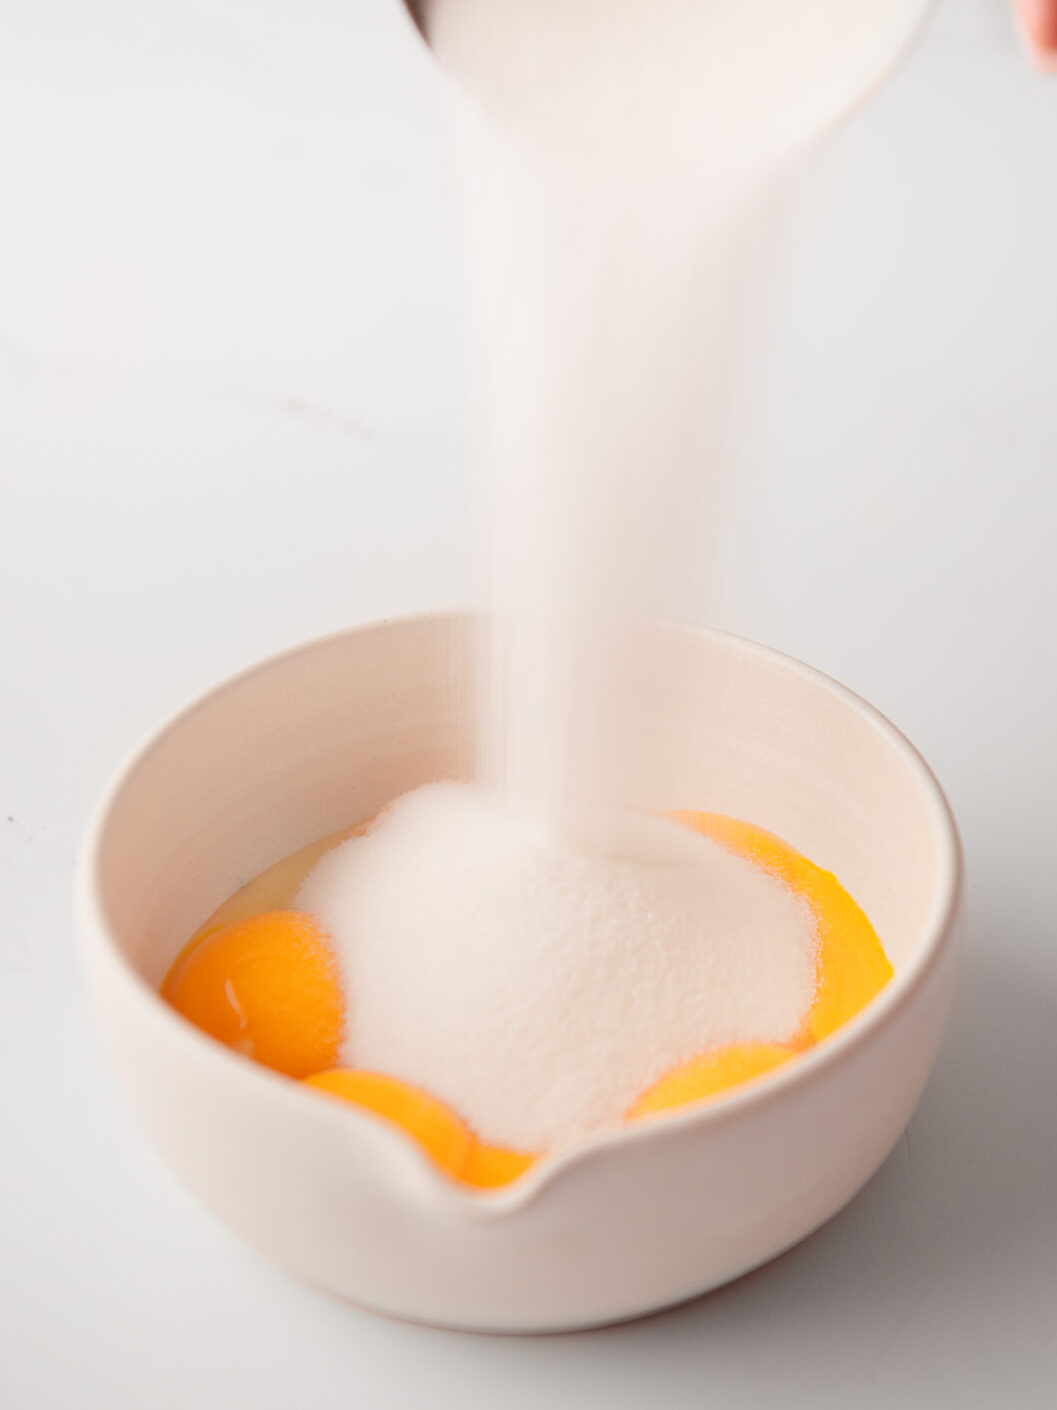
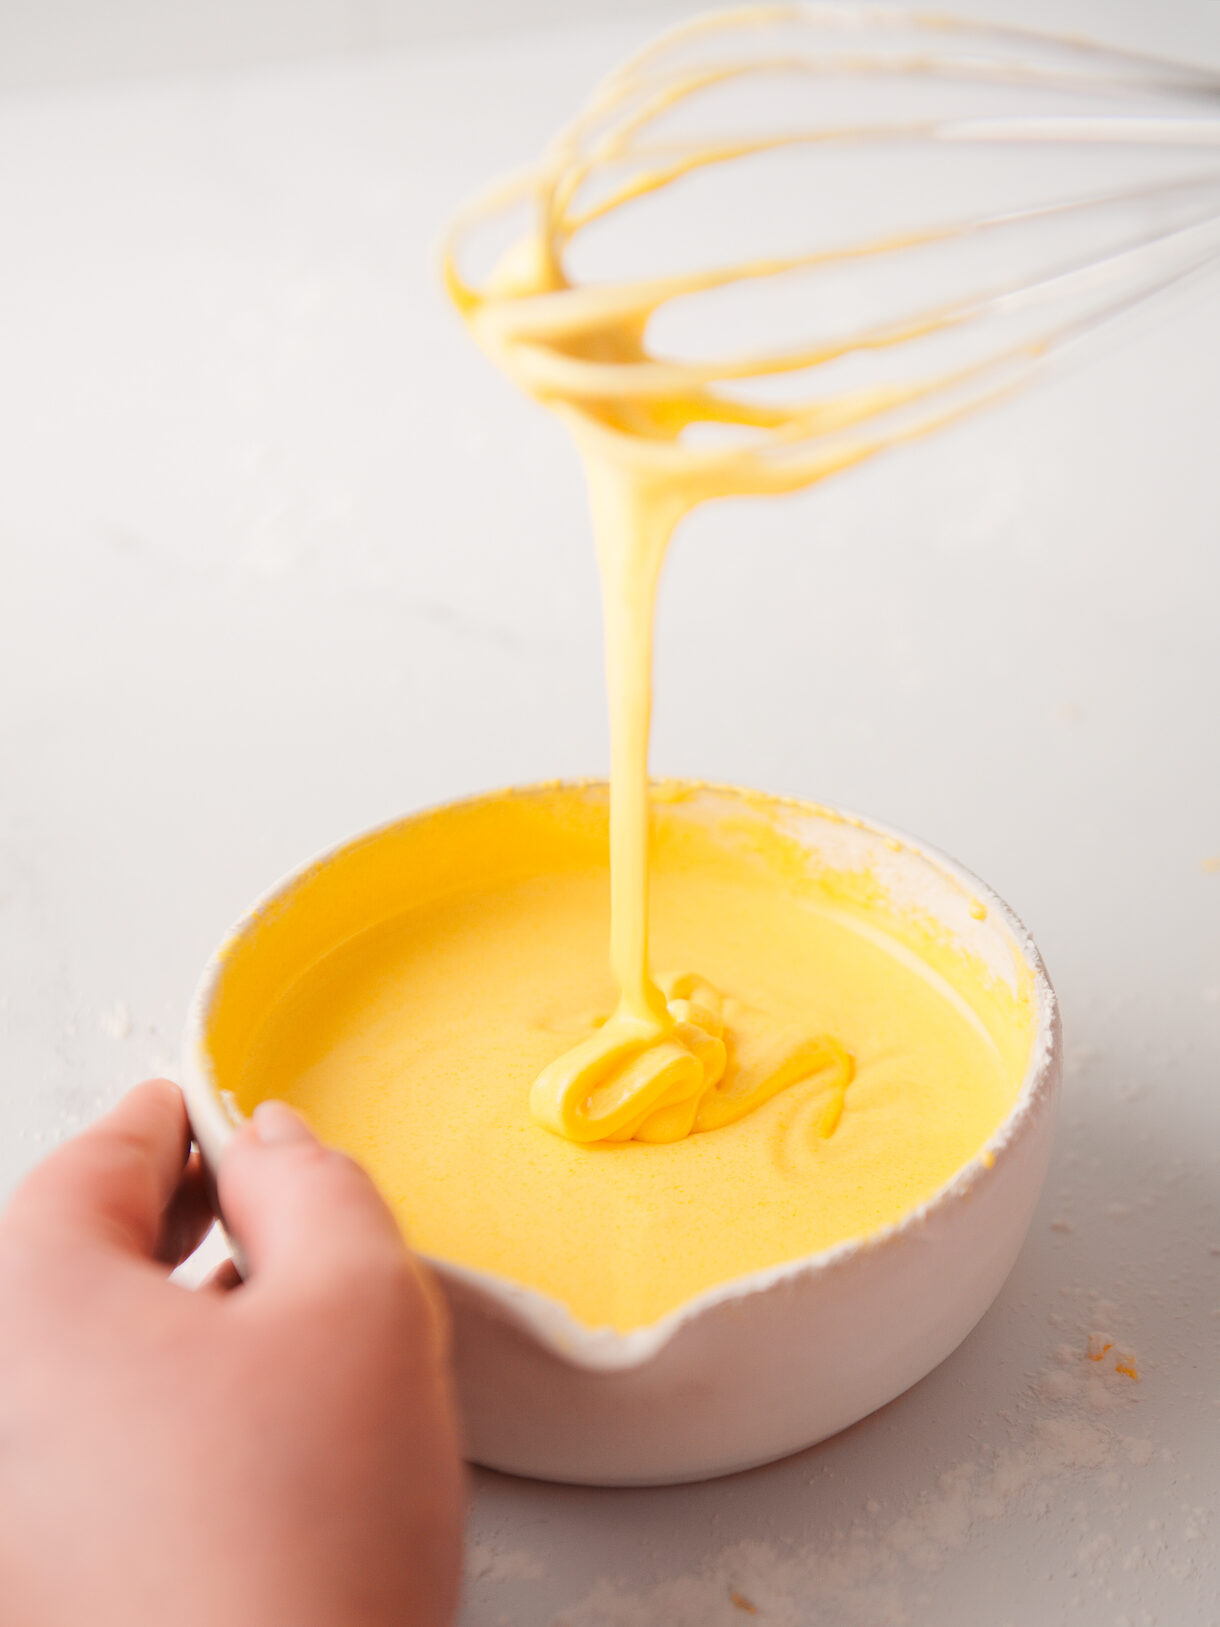
In a large bowl, whisk together egg yolks and sugar until light yellow in color. Then, add cornstarch and whisk until smooth and thick. 

Temper the eggs

Heat milk and vanilla in a medium saucepan over medium-low heat until steaming. Slowly add a little of the hot milk mixture at a time to the eggs while whisking continuously.

Whisk the cream until thick

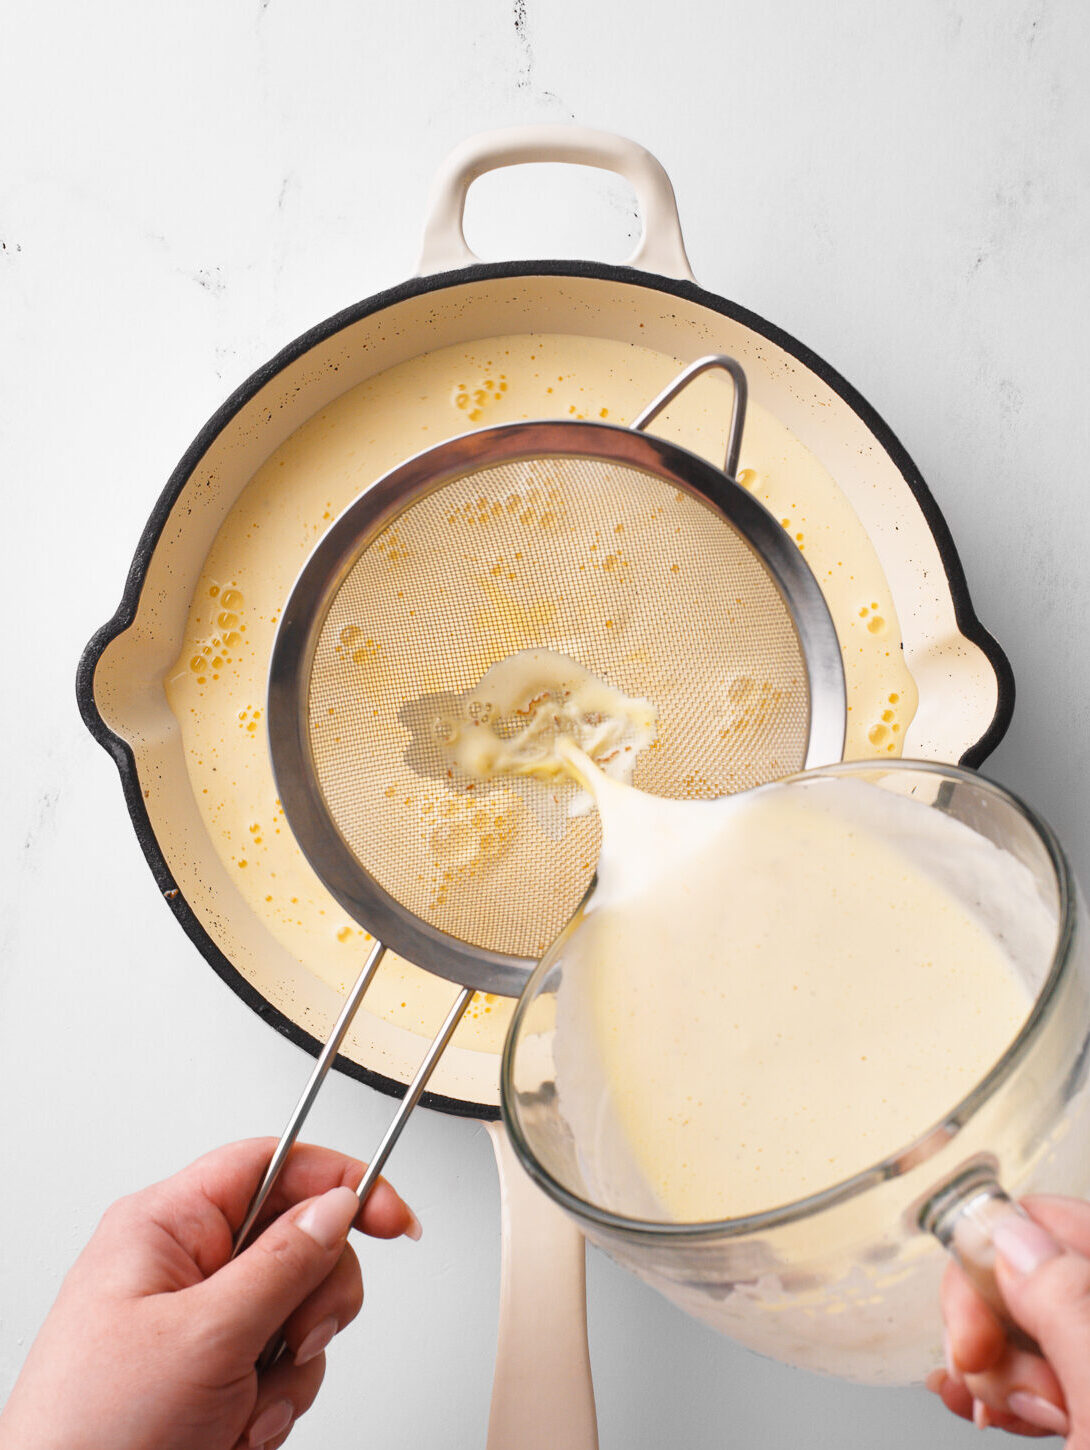
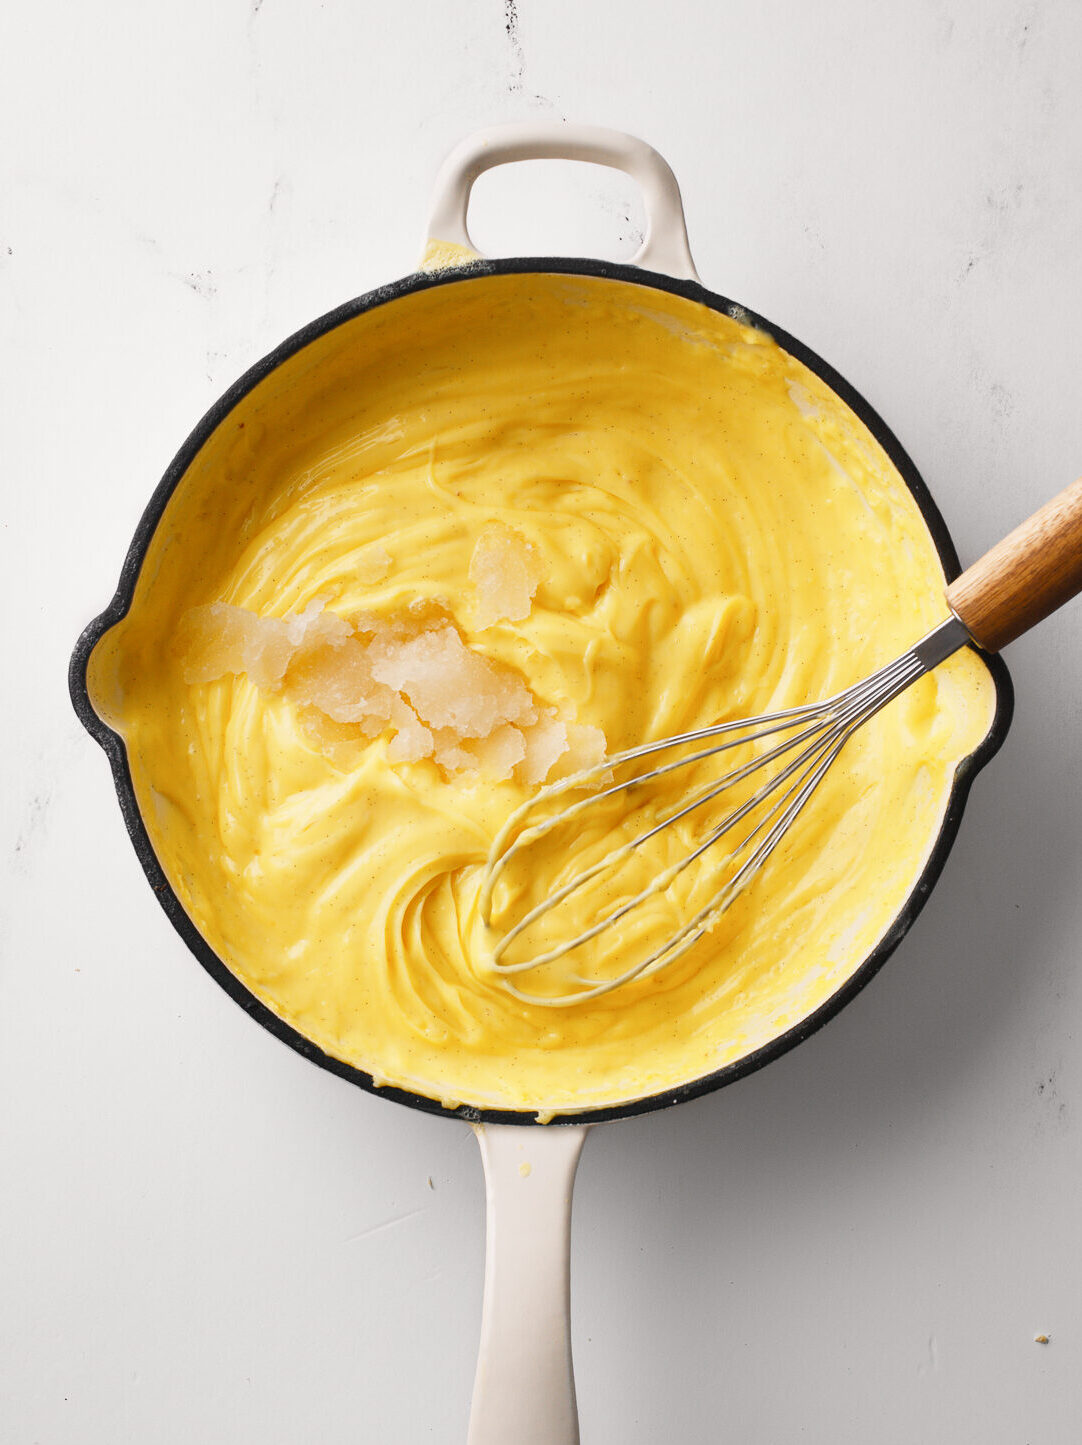
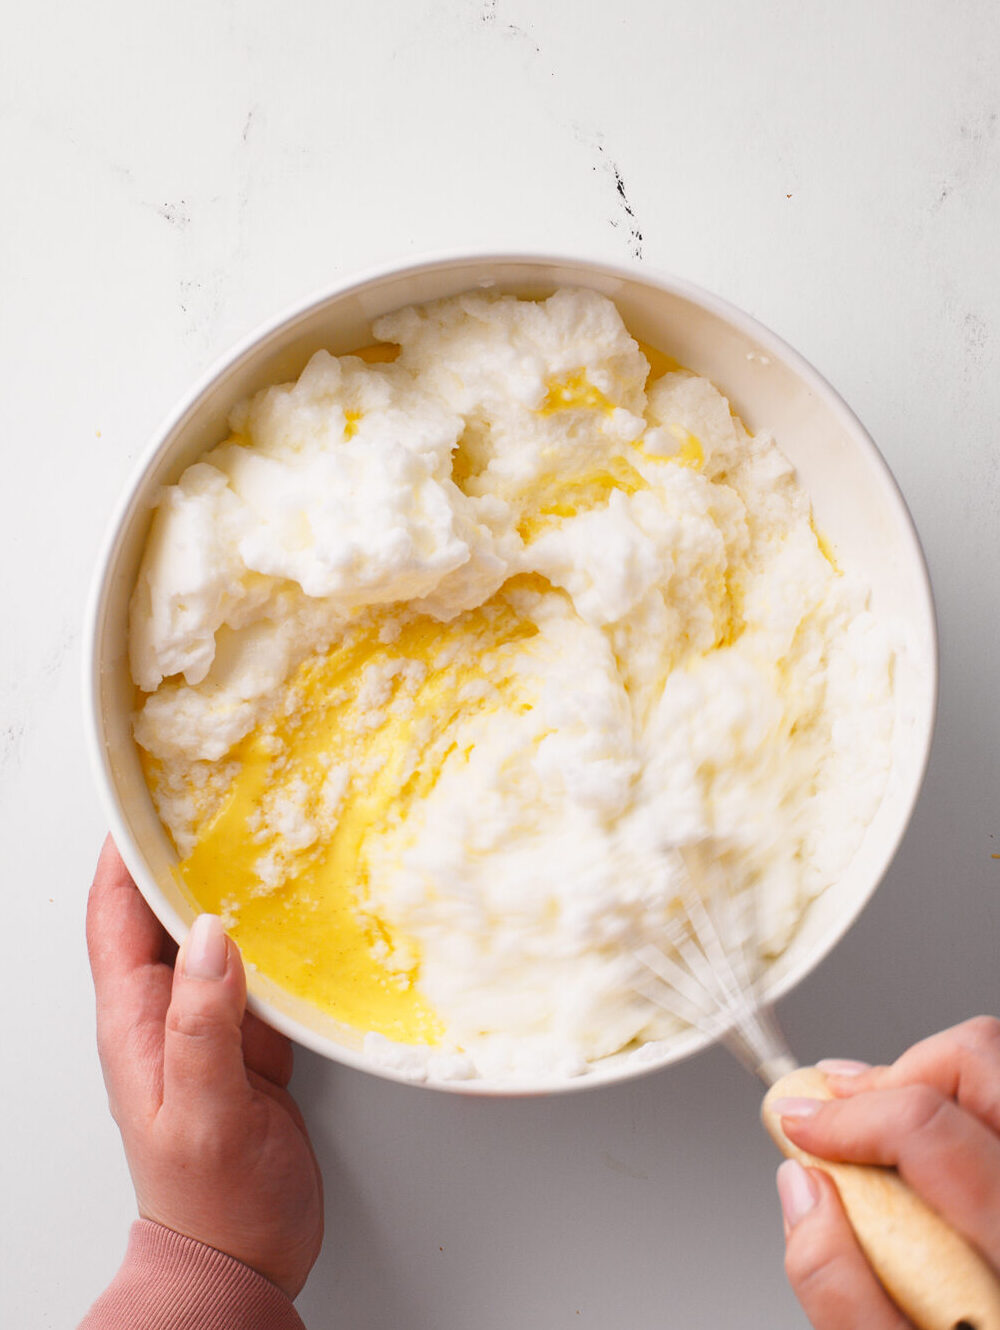
Pour the whole mixture through the sieve back into the pot. Gently whisk continuously for 5 to 7 minutes until thickened. Remove from the heat. Add the bloomed gelatin and butter. Whisk together until combined. While the custard is still warm, fold in the whipped egg whites until no more white is visible.

Set aside to cool

Directly cover the cream with plastic wrap to prevent a top layer of dry skin from forming. Place in the refrigerator for a few hours until thick and chilled. Before using, give it a mix to smooth out the texture as it will have set into a firm, thick custard.

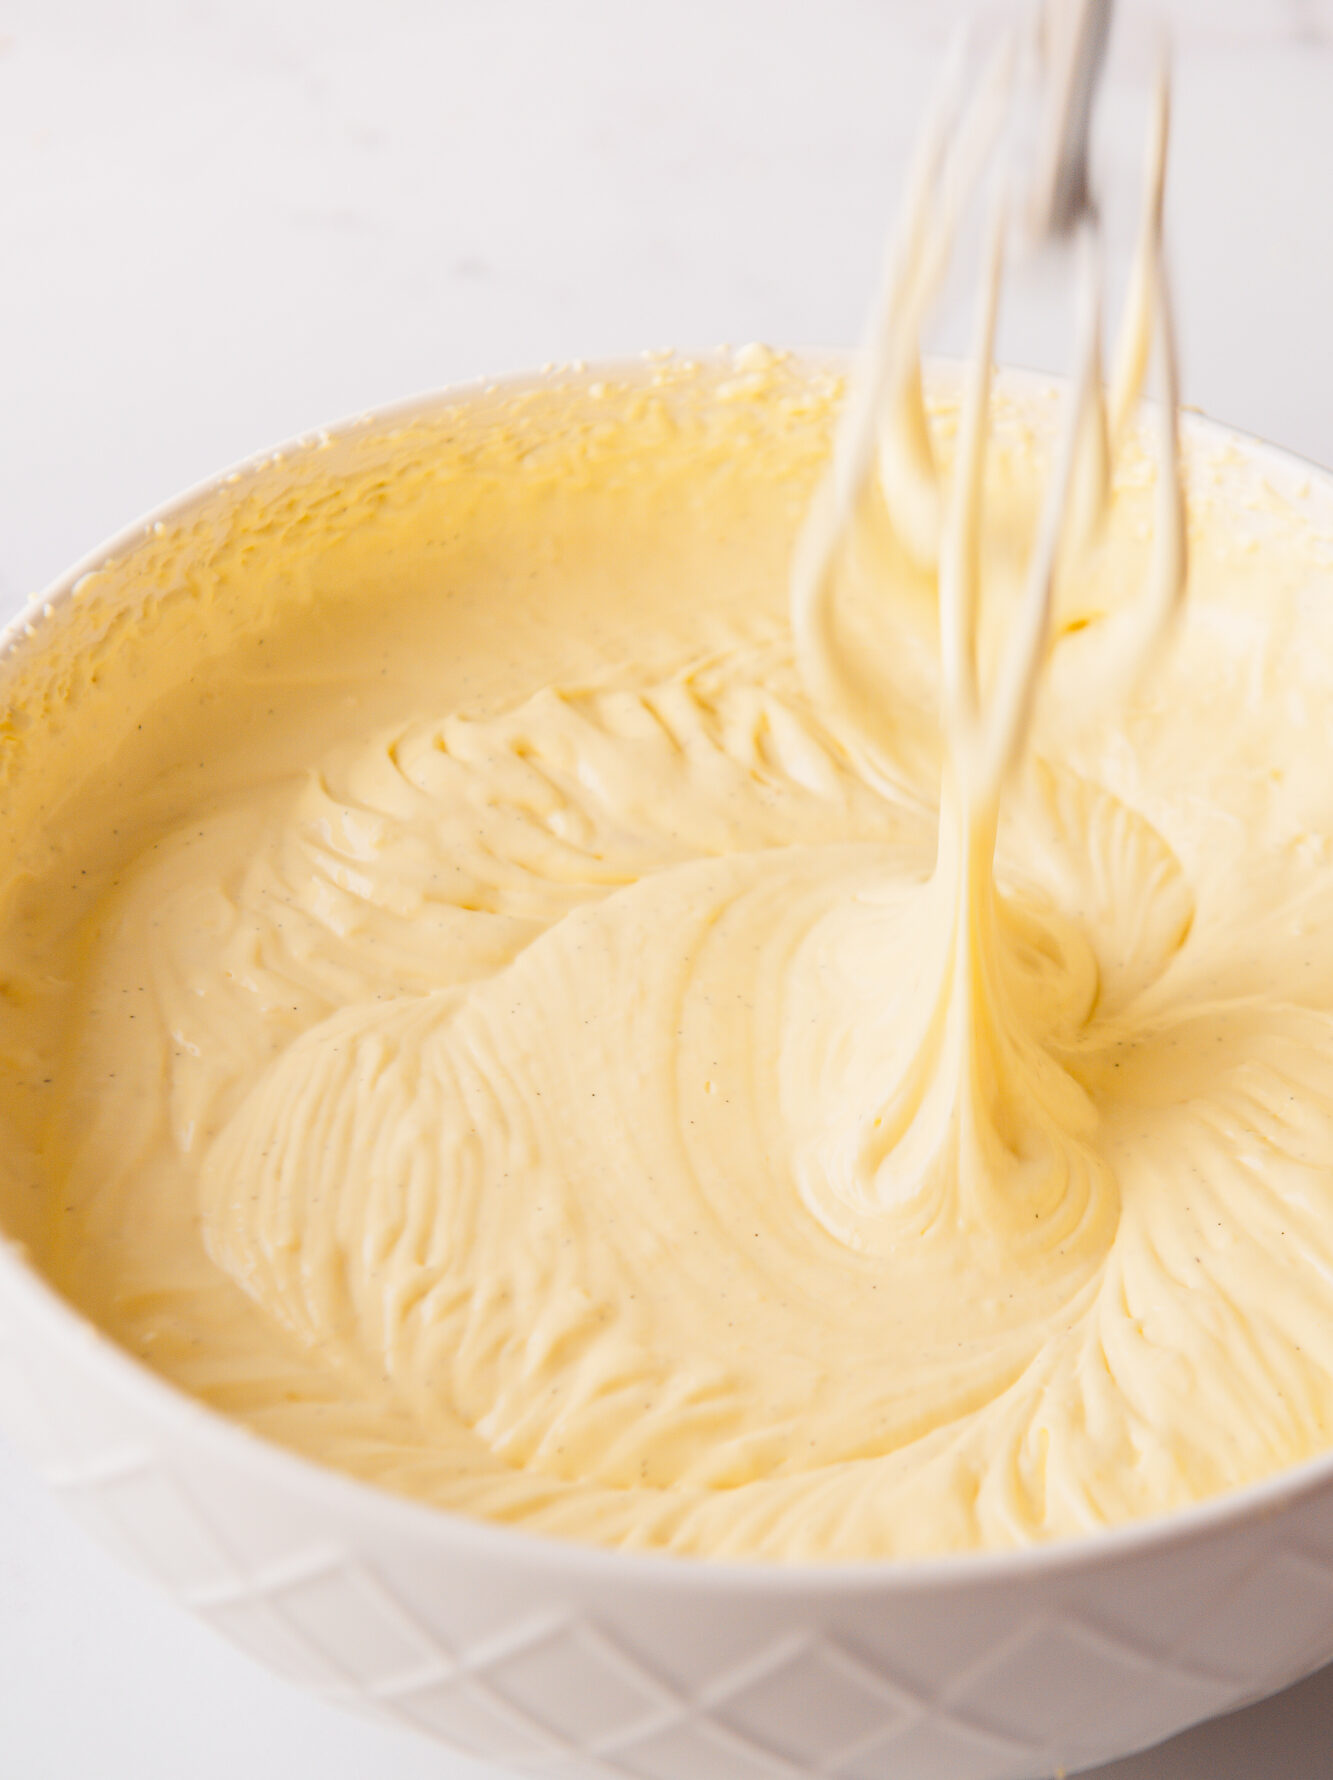
After the custard is chilled, use a hand mixer to whip the heavy whipping cream on high speed. Fold into same bowl as the custard until pale yellow, fluffy and thickened.

Note: Whisking the chilled custard will disrupt the gelatin but after assembling the cake and refrigerating, it will set again.

Expert tips from my test kitchen

Working with Store-Bought Puff Pastry

For best results, let the puff pastry dough thaw in the refrigerator overnight, then rest at room temperature for about 15–20 minutes before rolling it out (so it will be easier to handle and layer the sheets of puff pastry more evenly). Lightly dust your work surface with all-purpose flour to prevent sticking while you roll out the dough.

Don’t reduce the sugar

Sugar plays an important role in the structure and texture of the pastry cream. The overall recipe is not very sweet! 

Make the diplomat cream first

Pastry cream must be made ahead of time because it requires time to cool. I suggest making it the night or the day of. Set aside to cool in the fridge. 

Strain the milk and egg mixture

Use a fine mesh sieve to catch any lumps as well as larger bits of the vanilla bean pods.

Whisk the pastry cream continuously while it’s on the stove

This step requires your full attention. Whisking constantly helps keep the mixture clump free, promotes even thickening and prevents the egg mixture from scrambling.

Cut with a sharp, serrated knife

When cutting this type of cake, be sure to use a sharp knife to maintain the soft layers and prevent compressing the cake. A serrated knife works best.

Refrigerate over night

As this cake sits, the cream filling softens the layers of crispy, puff pastry. The longer it sits, the better!

How to make Napoleon Cake

The section below is a quick overview of how to make this recipe. For full details, see recipe index card below!

Make the diplomat cream

See above for how to make diplomat cream. Full directions in recipe index card below.

Bake the layers

Use a rolling pin to flatten the puff pastry into a rectangle. Place the rolled out dough a baking tray lined with a piece of parchment paper (a ‘prepared baking sheet’). Bake in a preheated oven at 425°F for 17 to 20 minutes until deep, golden brown. Press down the puff and remove the broken pieces. Set aside for the topping later. Place the puff pastry back into the oven for an additional 5 to 7 minutes until even more golden brown and crispy.

Assemble 

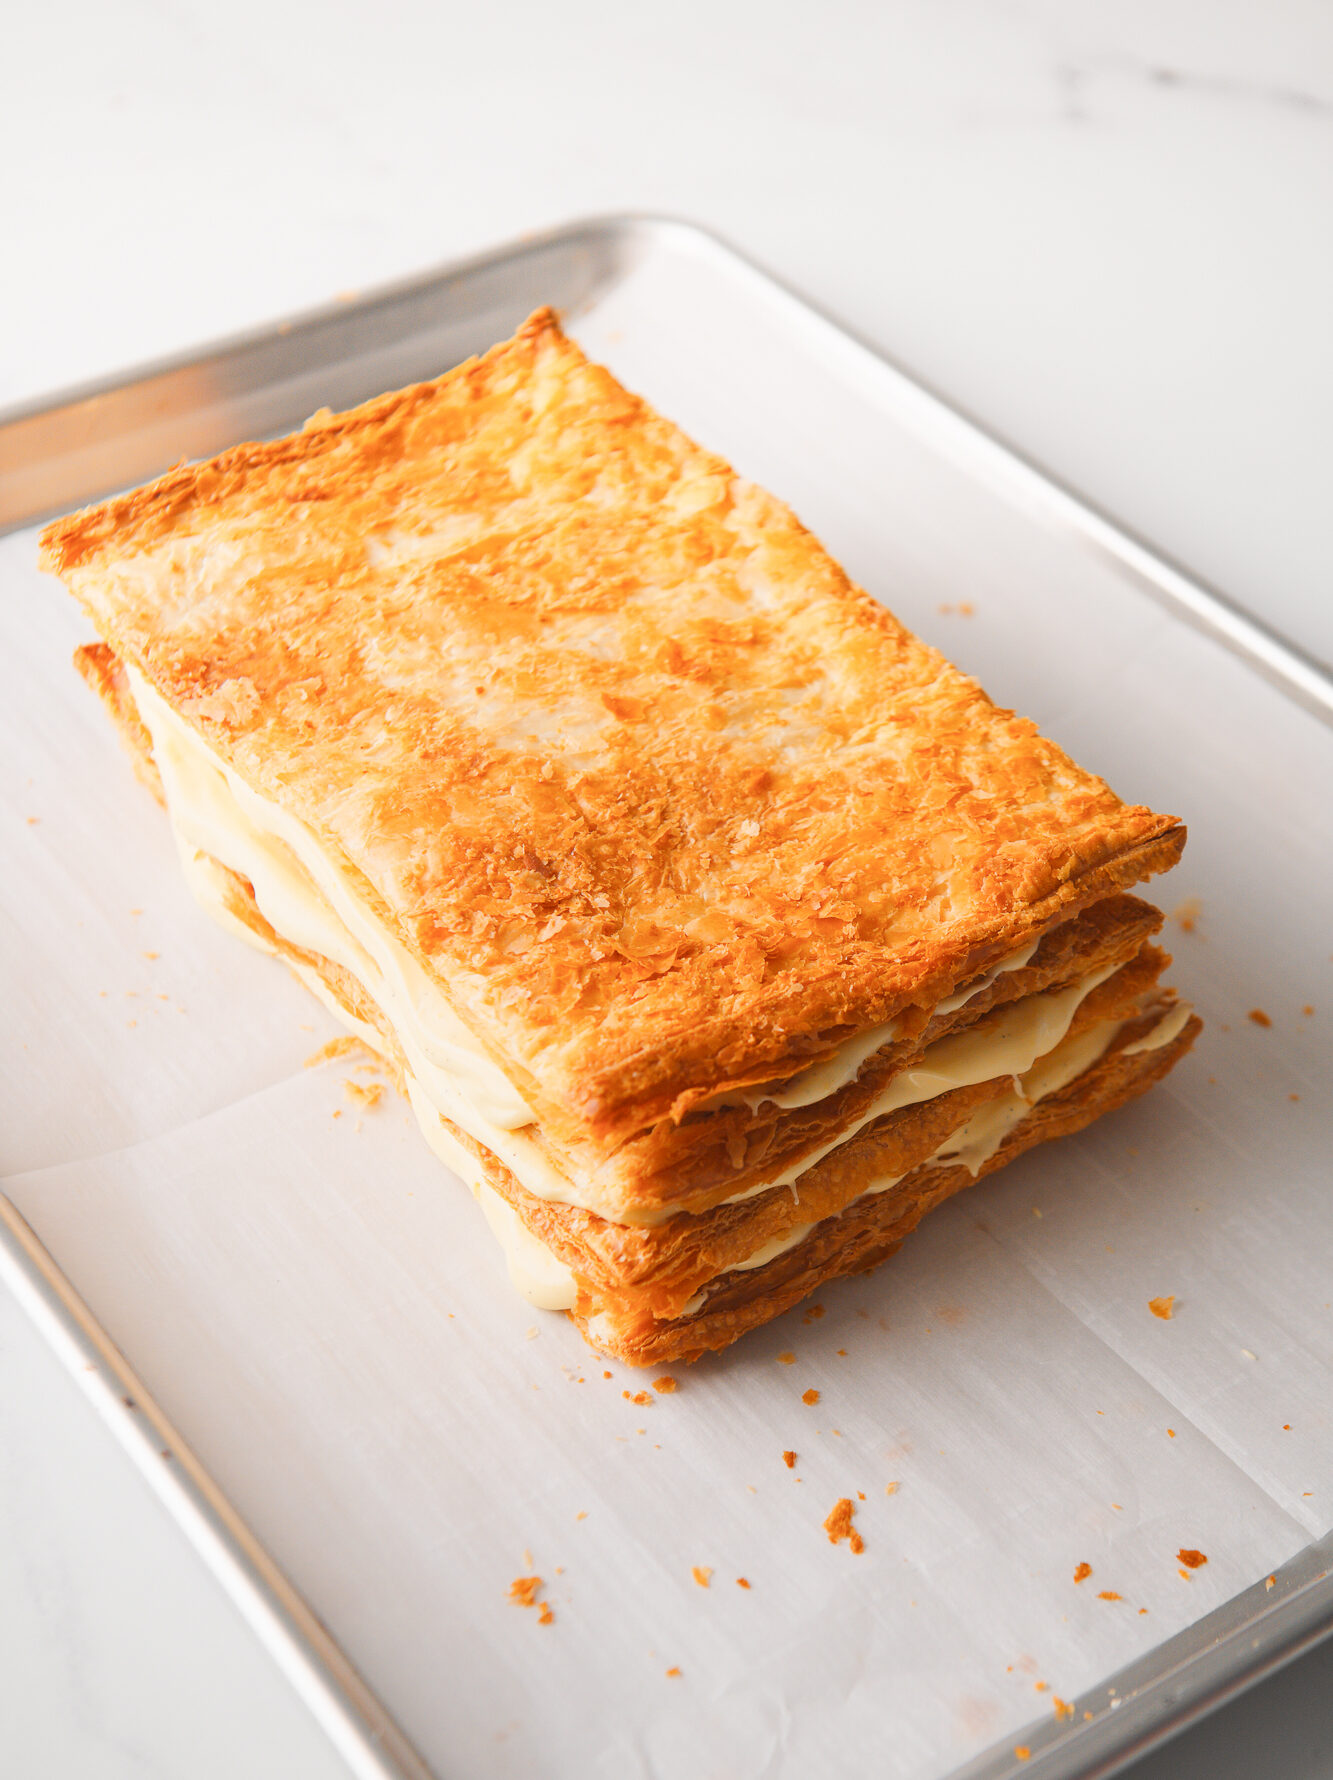
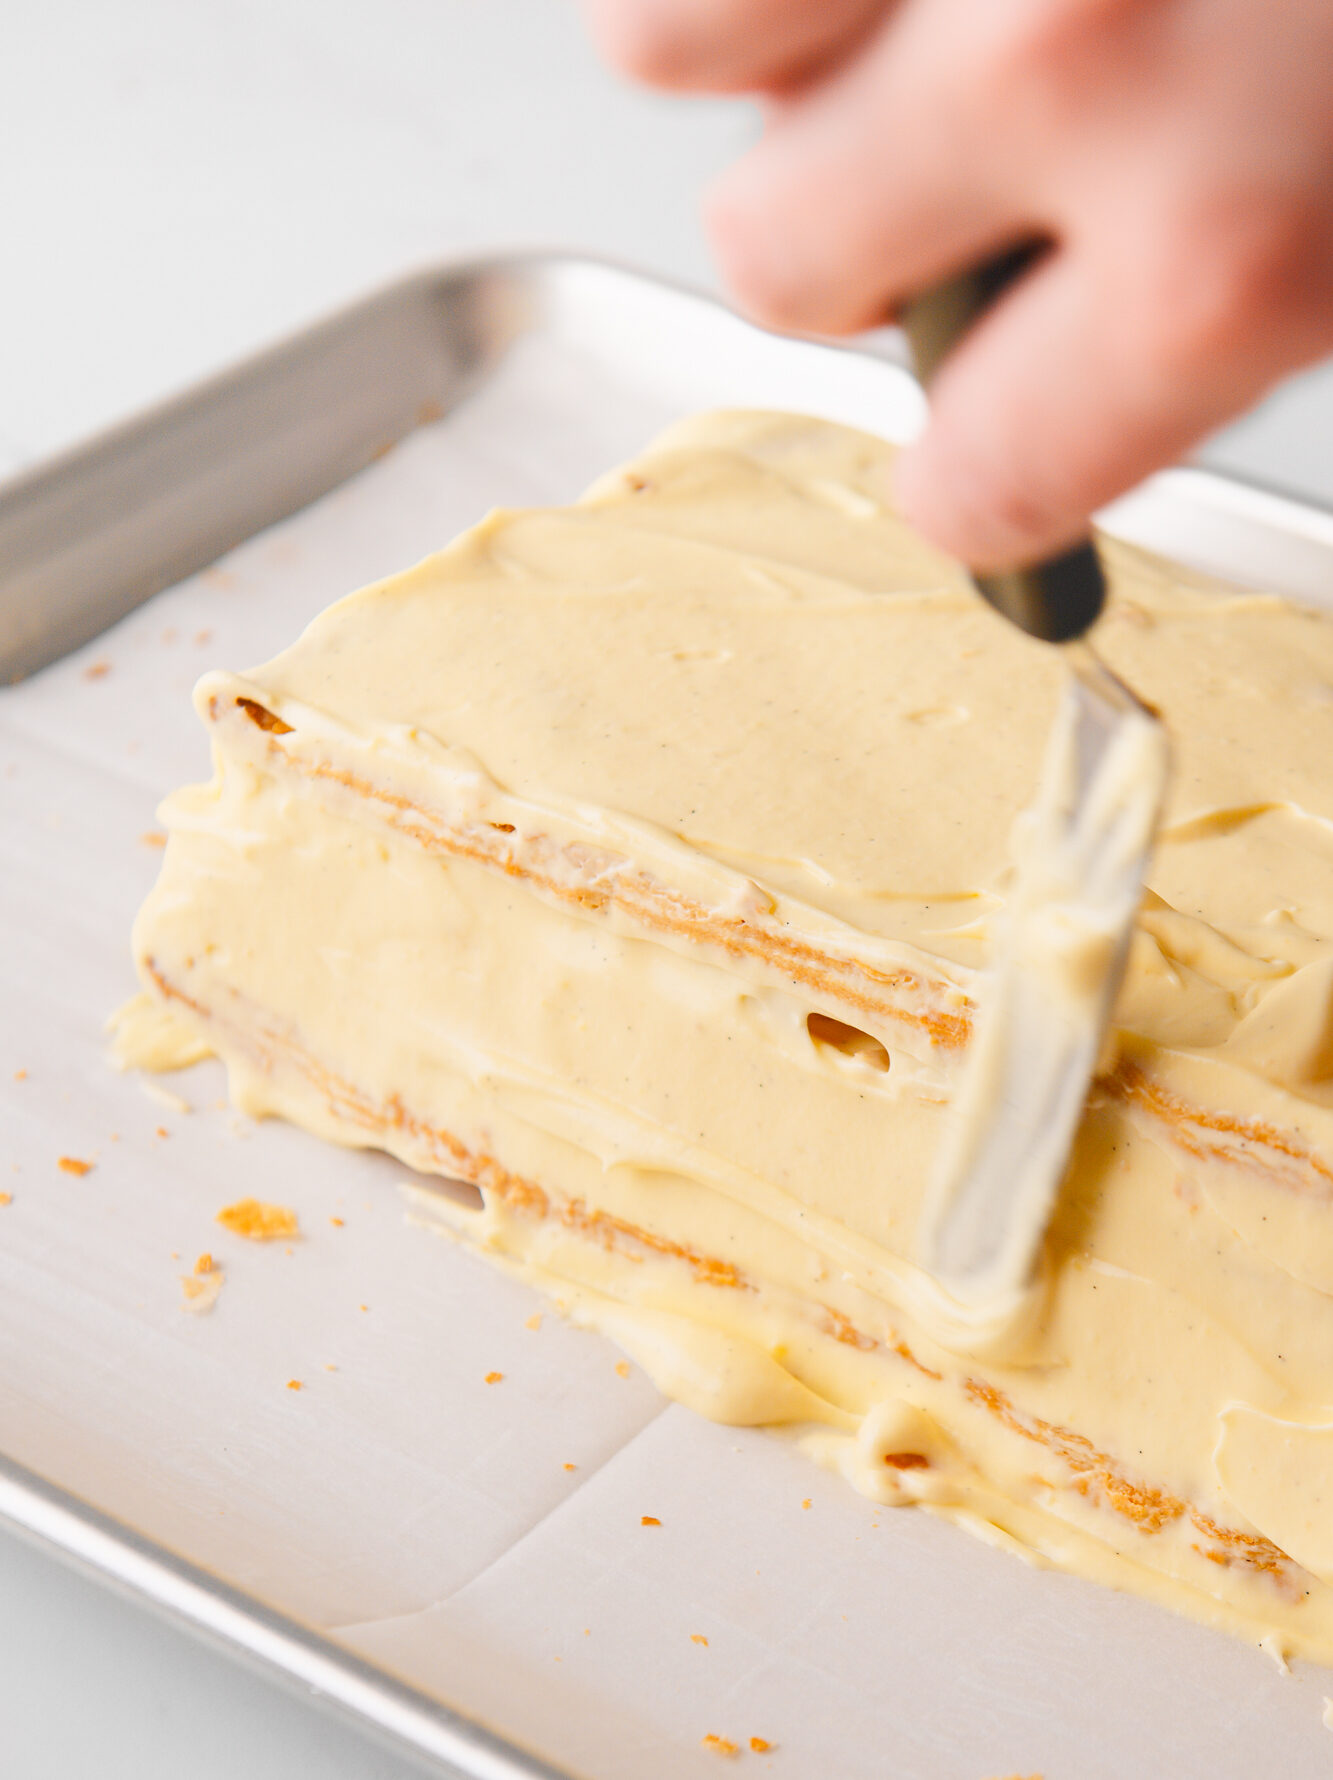
Cut each rectangle into two equal pieces to create thin cake layers. To assemble this layer cake, start with one of the baked layers of puff pastry on your serving plate. Spread a generous amount of cream on top to form one of the layers of pastry cream.

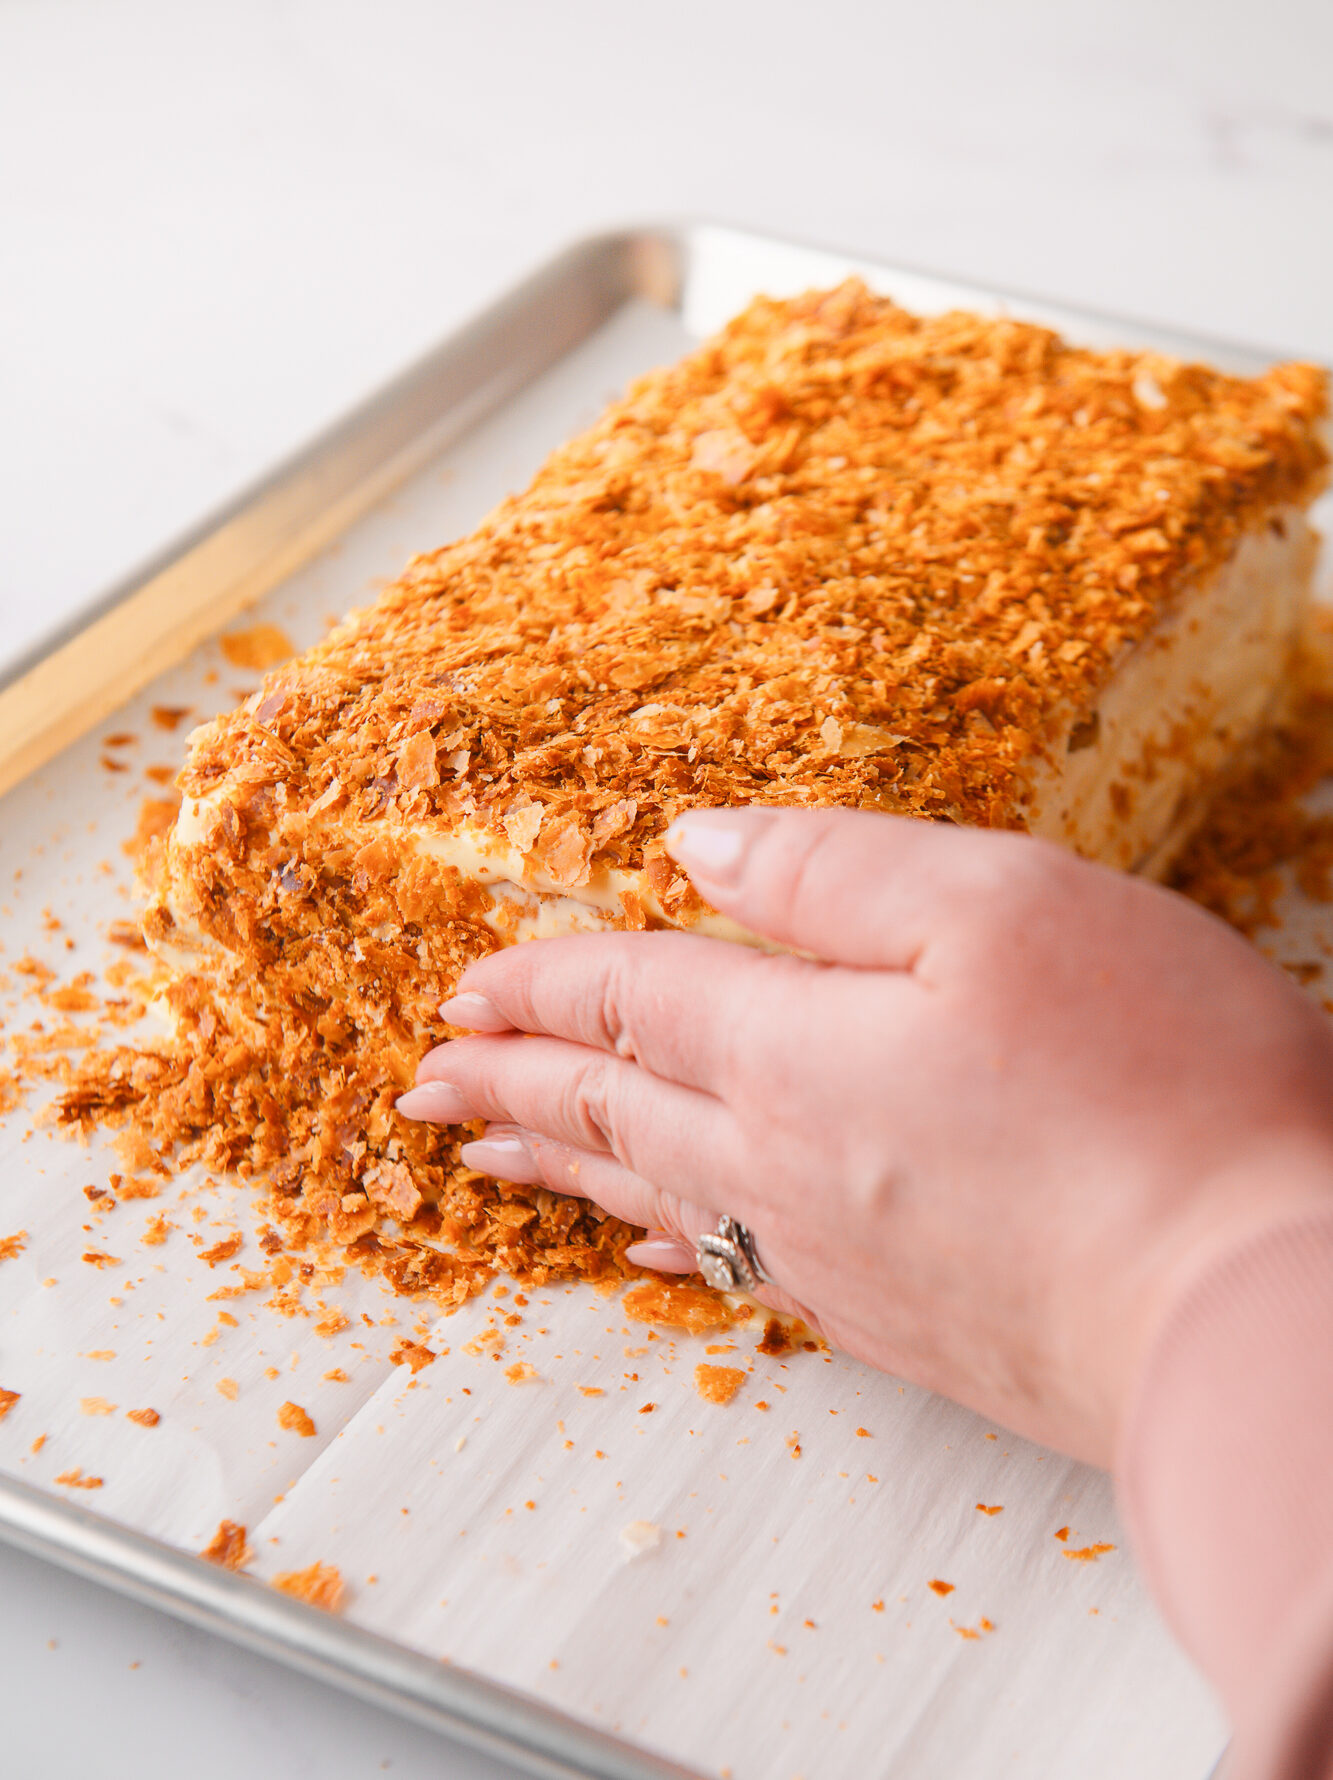
Repeat the process, alternating puff pastry and cream until you reach the next layer. Use any remaining cream to cover the top and sides of the puff pastry cake layers. Finish by sprinkling the crushed puff pastry pieces over the entire cake, gently pressing them into the cream for a decorative, bakery-style finish.

Refrigerate 

Cover the serving platter with plastic wrap and refrigerate for at least 4 to 5 hours but overnight is best. This helps the cream set and the layers soften, making it easier to slice.

Can I make Napoleon Cake in advance?

Yes! Napoleon Cake actually tastes better the next day as the layers soften, the cream solidifies and making it easier to slice. 

How do I prevent my cake from becoming soggy?

Bake the puff pastry until deeply golden brown to remove excess moisture. Let the puff pastry cool completely before assembly.

How long should I chill Napoleon Cake before serving?

Chill the cake in the fridge overnight or up to two days before serving. This helps the cream set and the layers soften, making it easier to slice.

How to store leftover Napoleon Cake

Napoleon cake is best served cold and a great make ahead recipe. As this cake sits, the cream filling softens the layers of crispy, puff pastry. The longer it sits, the better. Store leftover assembled cake in an airtight container in the refrigerator for up to 3–4 days to maintain its texture and freshness.

How is Napoleon Cake different from Russian cake, honey cake, and cream cake?

Russian Cake: Russian Cake is actually very similar to Napoleon Cake because many people use the names interchangeably. The main difference is that traditional Russian versions usually have more thin layers (sometimes 12–16) and a slightly softer, more custard-forward filling.

Honey Cake (Medovik): Honey Cake is a completely different dessert. Instead of puff pastry, it uses thin, honey-based cake layers that taste warm and caramelized. The filling flavor is tangier and deeper than the light vanilla diplomat cream in Napoleon Cake.

Cream Cake: Cream Cake is a broader category, but in general, it’s made with soft sponge or sheet-cake layers instead of crisp pastry. The fillings can be whipped cream, pastry cream, or stabilized cream. It’s much fluffier and lighter than Napoleon Cake, which relies on flaky pastry and a custard-based filling.

Napoleon Cake slice on scalloped plate.

I hope you love this Napoleon pastry recipe! Your feedback is valuable to us. If you have any questions, please let me know in the comments. If you try my recipes and love them, please take a moment to leave a five star review. Thank you for being part of the Bake Cook Repeat community! Don’t forget to follow us on Facebook, Instagram, Pinterest and Subscribe on YouTube for more puff pastry dessert and baking recipes! And be sure to check back soon for more new posts!